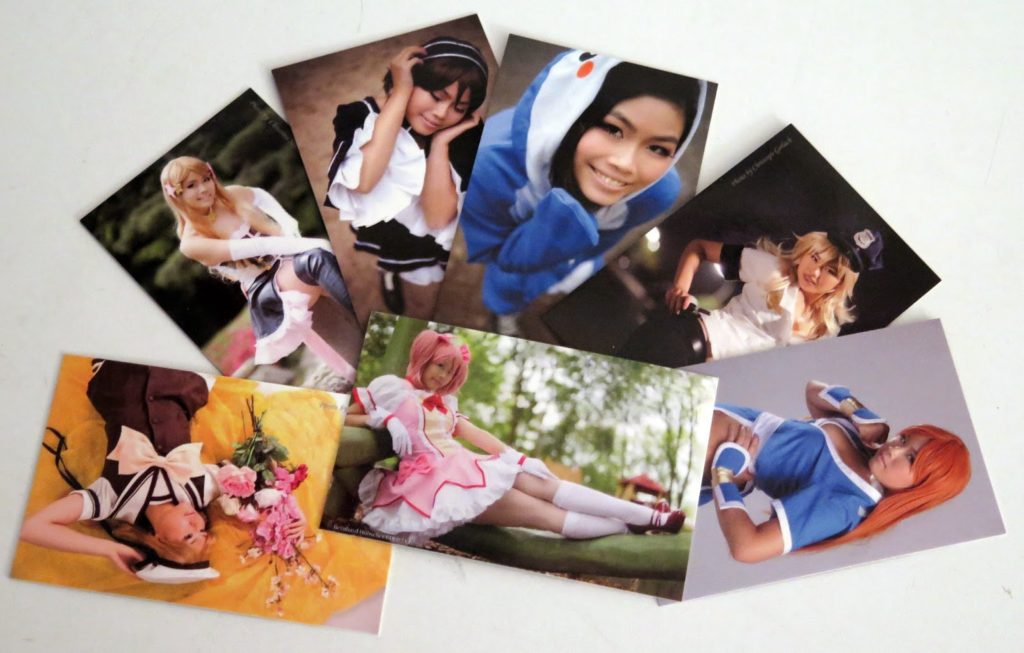
Photo Studio: Hacostadium

Photo Studio: Hacostadium

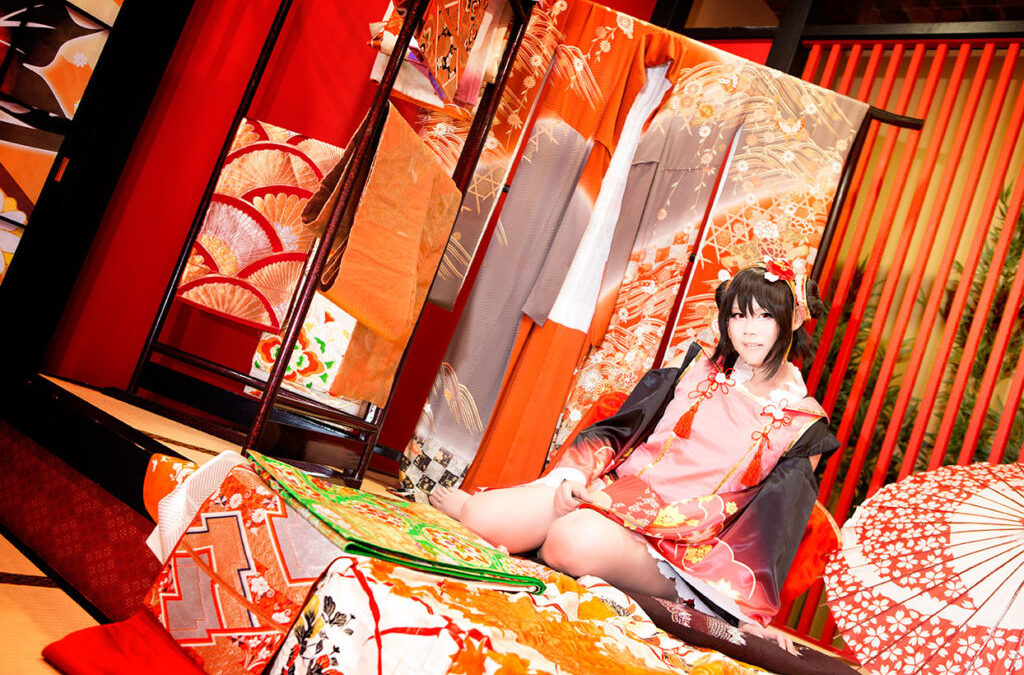
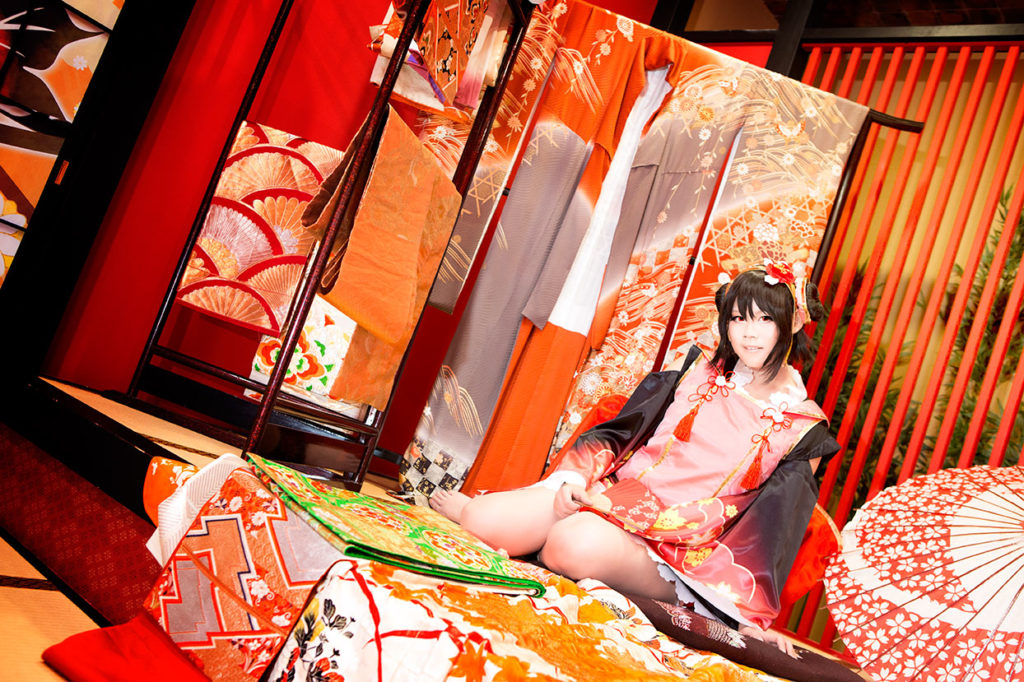
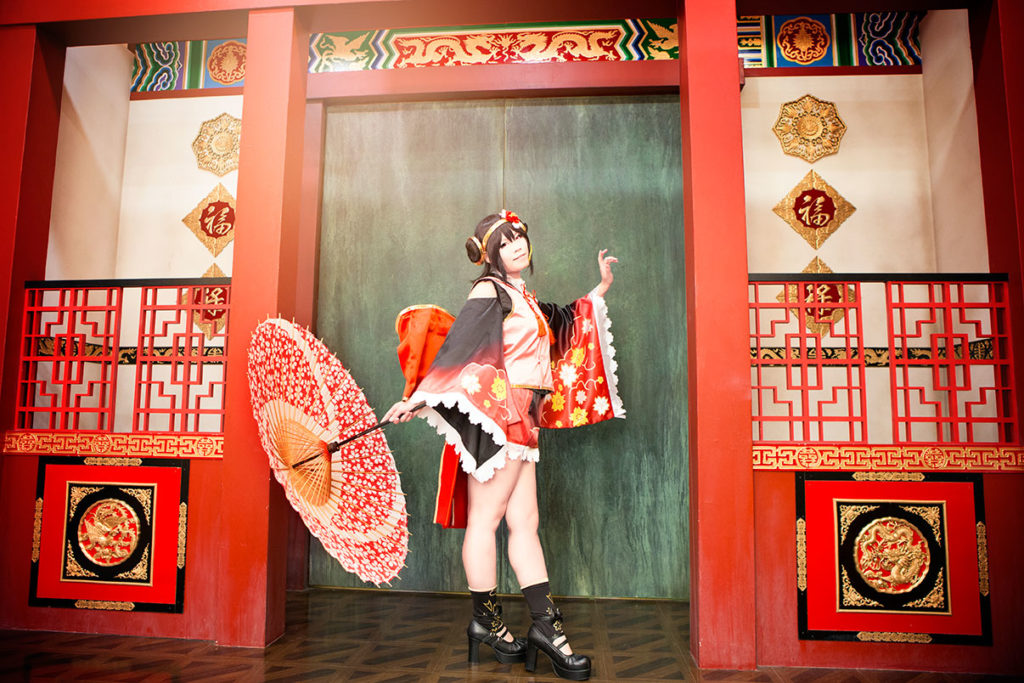
Picture by Meermiau

I wrote an blog about Cosplay photo studios in Japan:

 
Some people asked me if I could write about specific Cosplay studios which I visited and would recommend to other Cosplayers.
If you can speak fluently Japanese and read/ fill out forms I would recommend the studios of Hacosta. If you cannot speak Japanese you should bring a fluent speaking Japanese friend with you. If not you might be in trouble.

Although the staff is very kind, they don’t speak a single word English. They searched several times for me in order to explain things to my not Japanese speaking friends. The rules in the Hacosta studios are quite strict and you may get kicked out.
 

You also should not come dressed in your Cosplay. Always dress and change back at the studio itself. If you are coming dressed they might refuse your entry.
 
 
Hacosta
is a company which owns several studios in Japan:
-> Hacostadium Tokyo (1 hour from Tokyo -> Funabashi)
-> Cosset Tokyo (Ikebukuro)
-> Hacostadium Osaka (Nanba)
-> Cosset Osaka (Nipponbashi)
-> Curas (Kawasaki)
Hacosta only owns share studios. You are paying an entry fee for a certain time frame (1.900 yen (5 hours)- 4.800 yen (10 hours)) and can use every photo setting which is not occupied freely. The time frame includes your changing and Make-up time.
 
You are allowed to use the pictures freely as long is it for your own promotion. Even making photo books/ print items and selling them is permissible.
 
The studios are offering lockers, changing rooms, a small restaurant, Cosplay goods, rental services and free Cosplay amenities. Hairspray, combs, bobby pins, cotton pads, scissors and more can be used for free.
The rooms are equipped with artificial day lights and can be turned off. You can find reflectors and ladders scattered all over at the studio. They are for free usage.
Hacosta only offers the studio settings. I haven’t seen any photographer service. So if you want to visit this studio always take a friend with you, who will make the pictures.
In Japan it is quite common just to go with a group of friends (all Cosplayer) and to take pictures of each other.
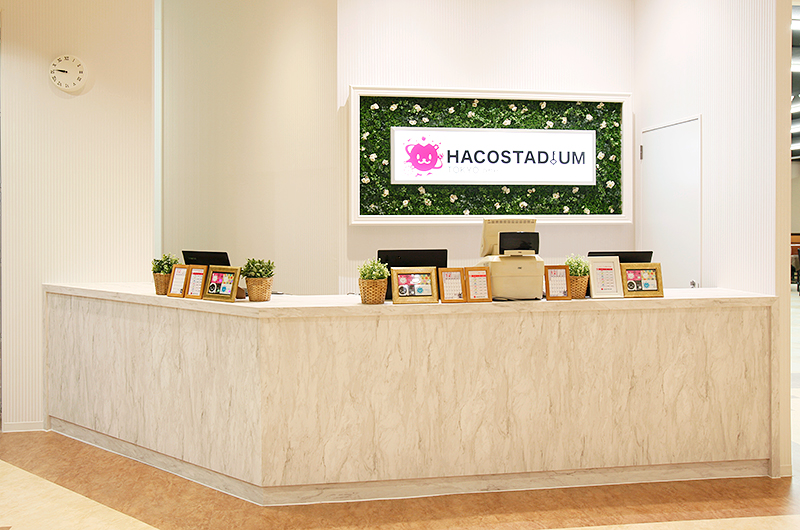


Ticket counter (Picture by Hacostadium.com)

Hacostadium Tokyo.one

claims to be the biggest Cosplay photo studio of his kind and offers more than 40 different settings. This studio is the newest one of Hacosta and has been opened at the end of November in Funabashi.
 
You should be aware that traveling to Funabashi will take at least 1 hour or more from Tokyo Station. If you are looking for an easier accessible studio, go for Ikebukuro or the studios in Osaka.
We decided to go for Tokyo.one because we wanted to enjoy such a studio as much as possible. So why not trying out the biggest studio in the world?
 
Presale:
I highly recommend buying a ticket before head. It will make things much easier and you can be sure to get an entry ticket. Hacostadium announces daily at twitter if tickets are still available. I noticed that you definitely should use the presale if you intend to go on Friday – Sunday, public holidays or event days.
 
On normal weekdays it shouldn’t be a problem. But you should try to be there at 9:30 am (opening time), to be sure to get a ticket.
Staca (Picture by Hacostadium.com)

If you want to reserve you need to create a Staca account. Staca is the membership of Hacosta and you need this membership for everything you going to do in these studios.

After you created an online account you can just go to the calendar and buy your desired ticket. Be sure to fill out the forms correctly (the Google website translator don’t work on this side), it might cause trouble afterwards.
 
Be aware that you are booking the right studio/ day and time, because the tickets are not refundable. If you are going with friends everyone needs an own account. You can buy tickets for other people but need to pass the tickets to your friends online. So if they don’t have an account buying two tickets won’t help you because you cannot pass the ticket to your friend.
You will be named as ticketholder and the entry of your friend might be refused.
Also going to a Hacosta studio before head without a membership won’t help you, because you need a Japanese phone number for a presale ticket. If you already have a membership just going to the nearest Hacosta studio and buying a presale ticket works.
 
Ticket:
 
Ticketprice
Time frame
Normal
Presale
Weekdays
9:30-20:00 (10,5 hrs)
3.500 yen
3.200 yen
9:30-14:30 (5 hrs)
2.300 yen
2.000 yen
15:00-20:00 (5 hrs)
2.300 yen
2.000 yen
Weekend and public holiday
9:30-20:00 (10,5 hrs)
4.800 yen
4.500 yen
9:30-14:30 (5 hrs)
3.200 yen
2.900 yen
15:00-20:00 (5 hrs)
2.900 yen
2.600 yen
 
 
I already got an account on Staca but because my friends couldn’t manage to go through the Japanese page I didn’t bought a presale ticket online (because a refund is not possible).
So we checked if day tickets were still available and just went there.
The studio is located in a shopping mall. Hacostadium opens 30 minutes earlier than the mall so you have to wait at the main entrance (there is a Hacostadium flag). The staff will fetch you up and bring you to the ticket counter.
If it’s your first time you have to fill out some forms and than move to the ticket counter.
They will check your address and personal information’s. So be sure to bring an ID card which also contains your address. Because the staff couldn’t speak English she gave up asking my friend for an ID card with address…. So I am not sure if maybe a passport will just be enough.
In my cased they told me an ID card with address would be required.
 
I realized that the staff where panicking when they saw us and looked relieved after I started to translate. If you Japanese aren’t that fluent just give them a bit time. They have prepared English sheets for the ticket sale (but I guess only for the ticket sale…). They will do the registration silently while they are speaking to other costumer’s non stop.
After checking our personal information’s they will hand out your Staca card and give you a badge with a locker number.
From now on you are a Staca member and can earn Staca points. Which everything you are buying (even food and items) you can earn points and get a discount on the next ticket.
 
Changing:
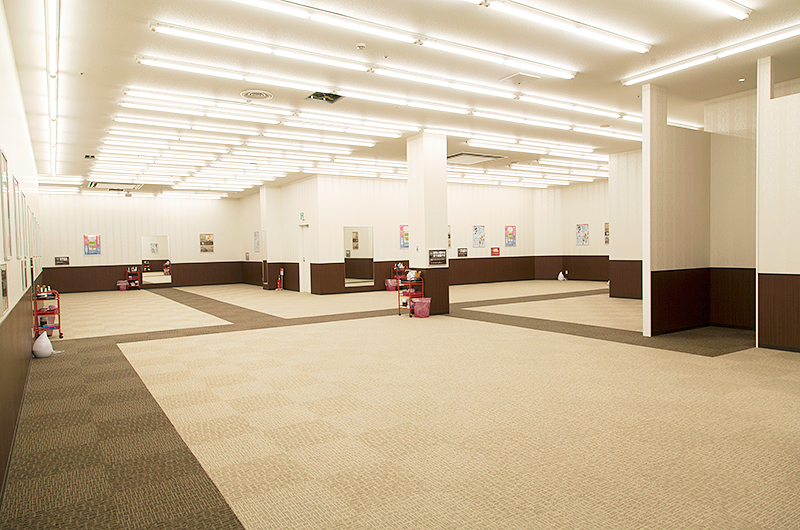

Female changing room (Picture by Hacostadium.com)
You can use your locker freely the whole time frame. You can place your whole things there and don’t need to drag them around with you.
Next to the locker are private changing rooms. You can use them but normally you are using the big changing room. It is a big hall with some mirrors. You also find cotton pads, bobby pins etc there.
 
You just go there, sit down and make your make up and changing. It is quite common for Japanese to undress in front of others from the same gender. So don’t be bothered.
 
I would recommend to bring an own small mirror. We were lucky, because we were one of the first costumers there. But after a while the places with a mirror have been occupied.
Just try not to spread your things to much in order not to disturb others or to take too much space. Pictures are forbidden at the changing area. Also refrain from cutting your wig. Hacostadium provides an extra room for wig cutting which are equipped with scissors, combs and hairspray.
After changing you just put your things back to the locker and are ready for a shooting.
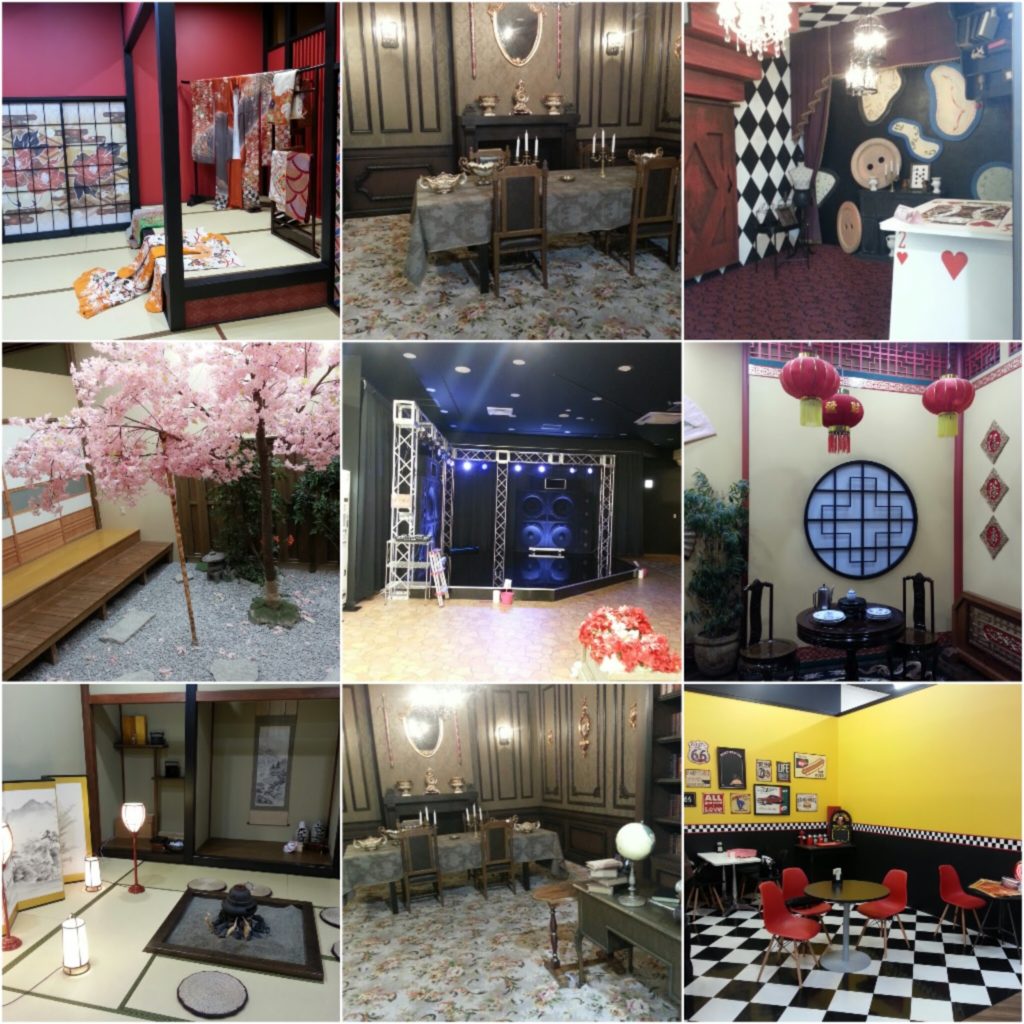
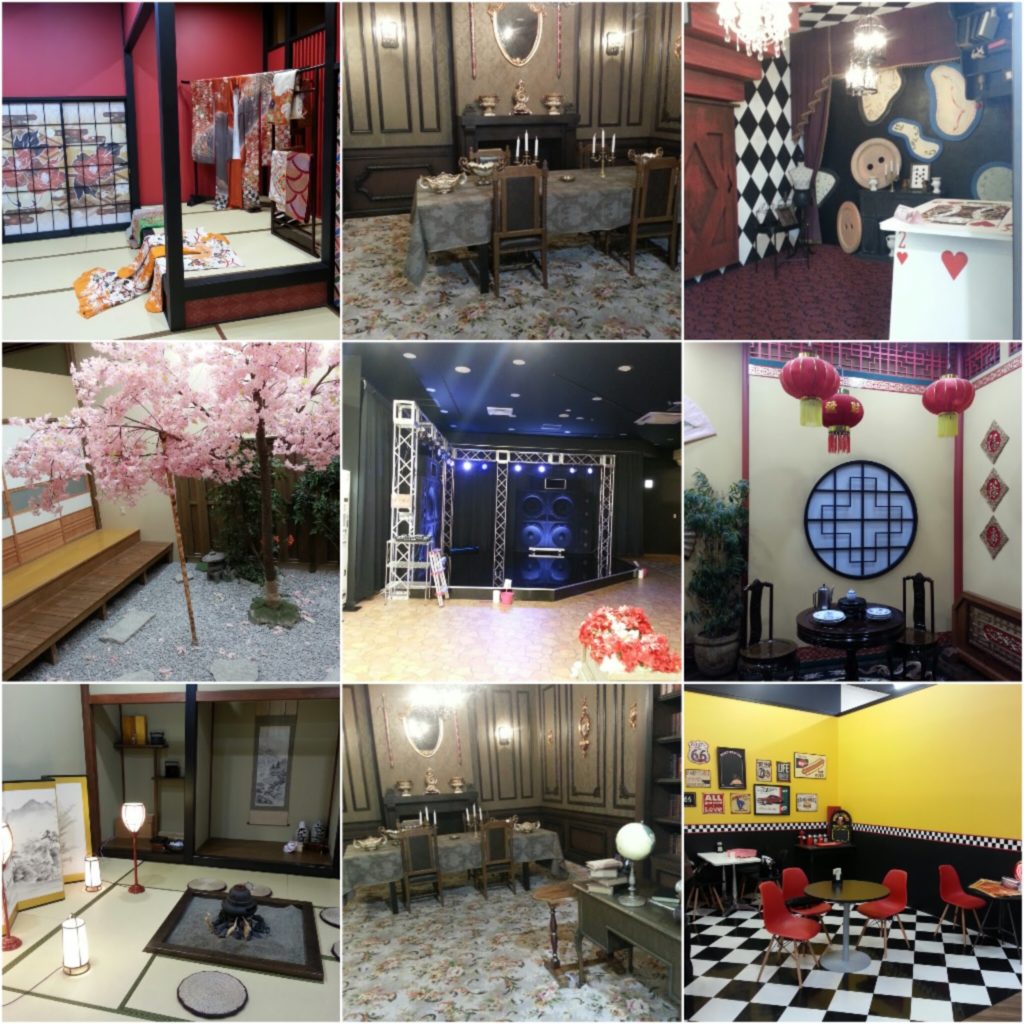
Studio settings (Picture by me)


Shooting:
 

Hacostadium Tokyo provides over 40 settings which are greatly designed and maintained.
Be aware that some shooting locations are the hallway which everyone uses. Try not to disturb other Cosplayers. If you want to cross a room or a hallway while people are shooting, please ask politely.
 
If a room is occupied, don’t just go to another corner and make pictures there. Wait until they are finished, but try not to wait too obviously.
Before entering a setting there are wet tissues for your shoes. Please clean your shoes before entering the settings in order to keep them clean.
At some settings shoes are not allowed. You can recognize these places with a shoe shelf at the entry (of course there is also a sign in Japanese). Put your shoes into the shoe shelf and go in. Even if you are wearing clean “Cosplay shoes” please refrain from taking them in.
You are allowed to use everything in the room you can find and to change the setting to your liking, just be sure to put everything back to his place.
Generally drinking and eating at the shooting area is permitted. But you are allowed to drink and eat at the café settings. I saw a lot of Cosplayers bringing their McDonalds breakfast to the café setting and to make pictures while having breakfast.
 
As a Cosplayer:
Try not to wear Cosplays which are taking up too much space. Also wear shorts if you are wearing a short skirt.
 
As a photographer:
Regarding to flashes and photo equipment there are a lot of rules, because you may block the way while shooting at the hallway. You are only allowed to bring a limited number of flashes, soft boxes etc. Please inform yourself before head to avoid trouble.
Don’t just take pictures of other Cosplayer. Please ask politely if you want to make a picture.
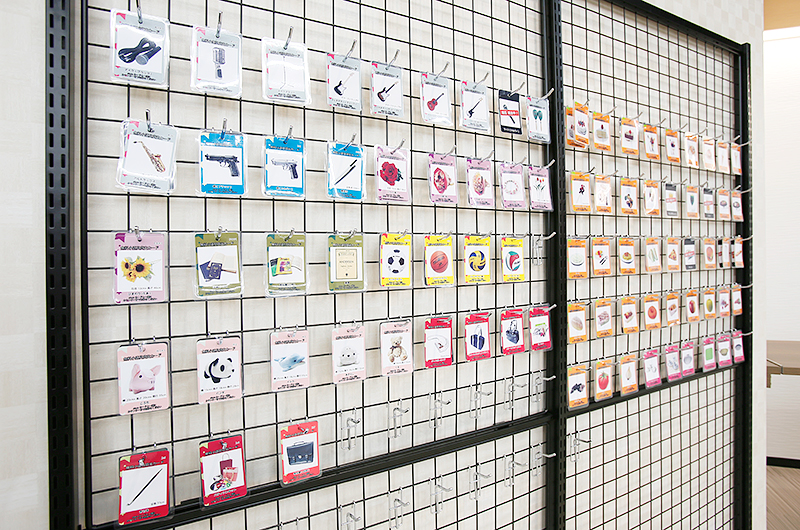
Free rental items (Picture by Hacostadium.com)


Rental services:
 

I really like, that you can rent Cosplay accessories for free. You can rent as much items you want, as long as you want and just return them after the shooting.
 
Next to the service counter you will find a wall with paper cards. Just take the paper cards which are showing the desired items, take them and go to the service counter.
 
The staff will gather your items, give you a bag for an easier transportation and scan your Staca card. When you are returning, they will check if you have returned everything and scan your Staca card again.
Afterwards you can rent new items for free.
You also have the possibility to rent a Nikon or Canon camera for free (2 hours) afterwards they will charge you 300 yen for the rest of the day.
They also provide flash, soft box, lens, SD card etc. renting service. A lot of items are free for the first 2 hours. You won’t pay more than 1000 yen for a rental (mostly about 500 yen). I think this is a good an affordable choice if you cannot bring your own equipment or just don’t have any space in your baggage left.
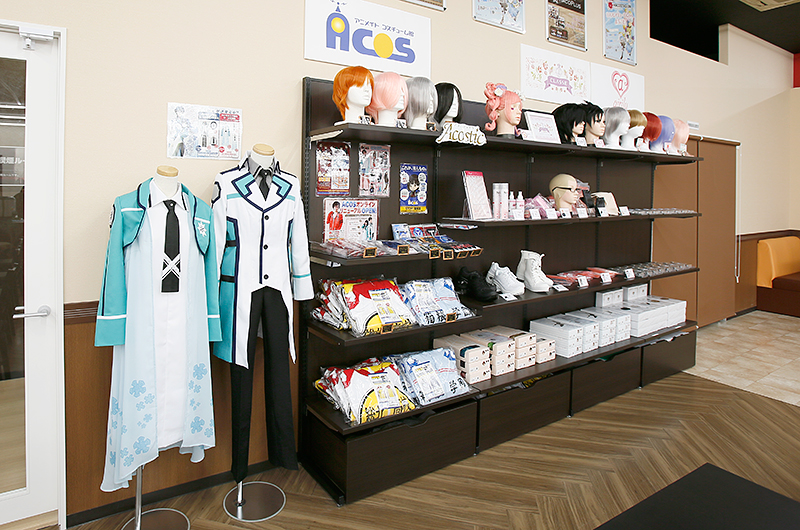
ACos shop (Picture by Hacostadium.com)


Hacoplus:
 

Hacoplus is the restaurant and ACos area which you can find directly at the entrance,
 
The food is very affordable and tasty. You can also get the food and bring it to the café area setting to make pictures with it. The staff always tries to let the food look good. That’s why you can use it as a shooting accessories without hesitation. The restaurant also provides free water.
 
If you forgot some Cosplay items like wigs, contact lenses etc. you can buy them at Hacoplus. They only have a small corner with Cosplay goods but still enough to rescue yourself last minute.
 
 
 Personal opinion:
 
I was a bit shocked how helpless the staff was regarding to my non Japanese speaking friends. My friends had a lot of trouble with communication and they were always searching for me. I was even surprised how much you need to communicate at such a studio (otherwise I would say; Ok just don’t communicate).
 
But all in one the staff was super polite and friendly, always gave their best to make it as comfortable as possible and were cleaning non stop. It was so clean…. Japanese toilets are great and clean but the most luxurious toilets I have seen in Japan were at Hacostadium and the Butler Café….
 
The settings are just amazing and very well maintained. The variety of free rental objects are great. The possibilities are just awesome and not even a bit comparable with the situation we have here in Germany.
 
The light was very good (although you really need a flash) and the other Cosplayers where always very considerate. Although we saw a lot of Cosplay groups it was always very silent and everyone tried their best not to disturb others, even if someone blocked the whole hallway. They just waited patiently.
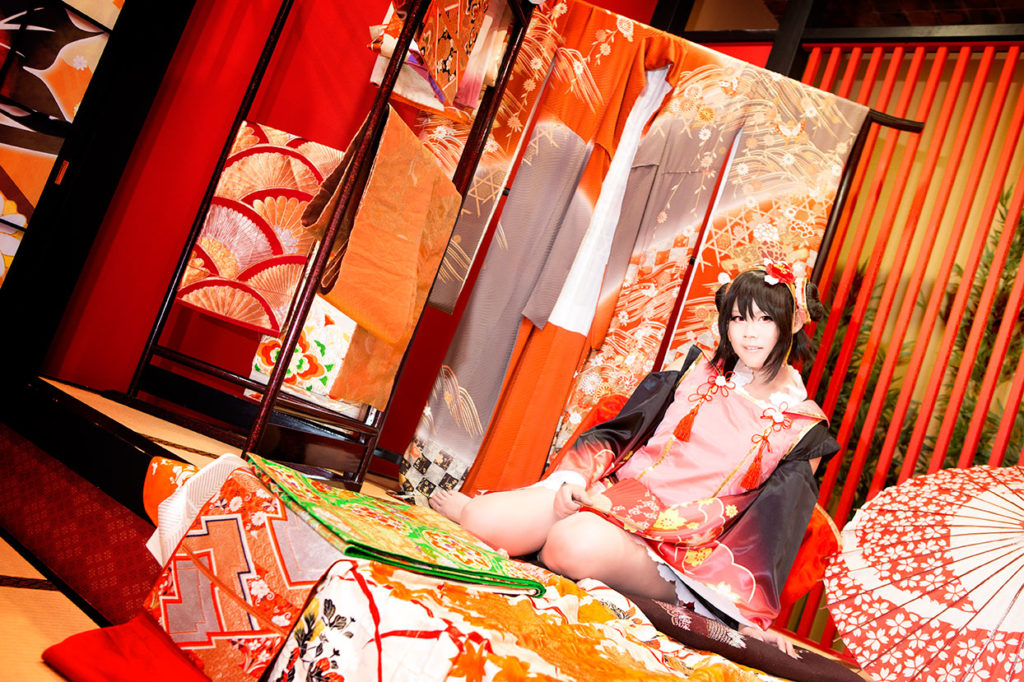
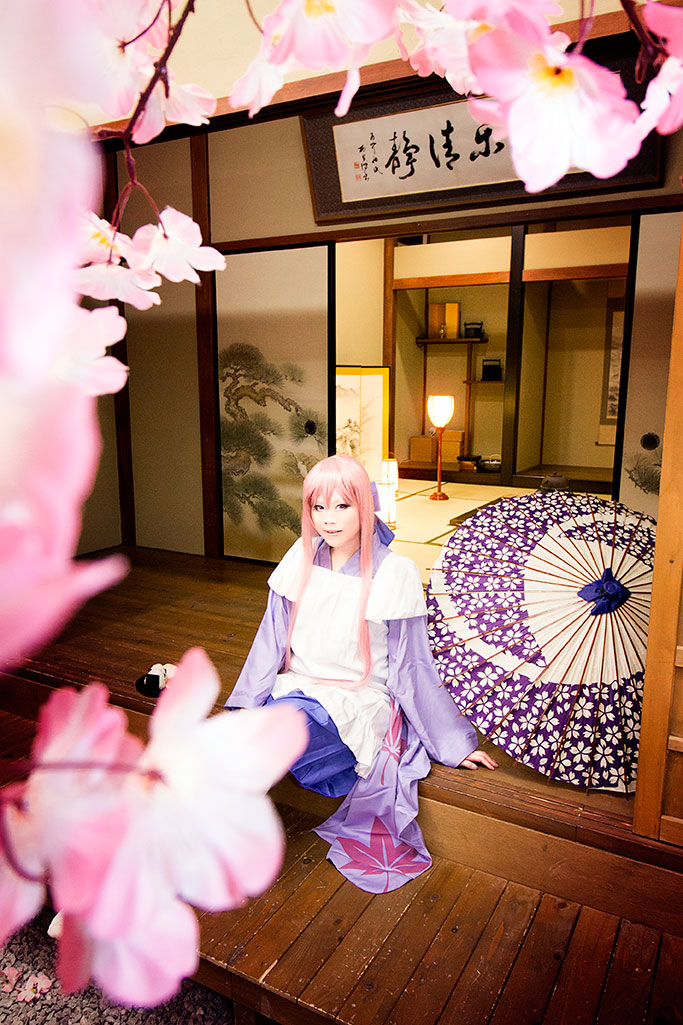
Picture by Meermiau

The food was very good and we really enjoyed the affordable flash rental service.

You could feel that the studio do his best to fulfill every need a Cosplayer might have during a shooting.
It was an amazing experience and I would recommend everyone to try it out once!
If you have any questions, please feel free to ask.
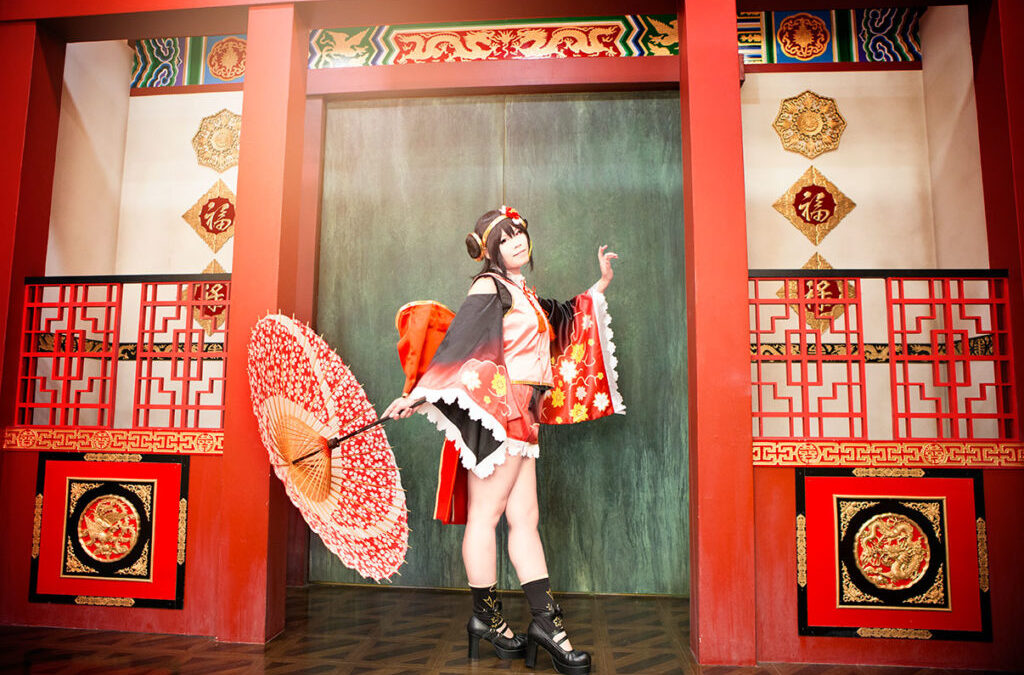
 
Cosplay photo studios in Japan

Cosplay photo studios in Japan

Picture by Meermiau

Japan is the wonderland for every Cosplayer.
You have shops where you can get wigs, Cosplays and accessories. You have Cosplay events and even photo studios with a Cosplayerfriendly environment. 

For Japanese Cosplayer, using a Cosplay photo studio is very common.
Instead of wandering around and searching for the perfect location you just look up a photo studio with a suitable setting and just booked it.
Cosplay photo studios in Japan have special furnished rooms with a themed setting (and if you need; just a white/ black wall).
Most of the studios are providing several settings to fulfill the needs of their customers. They also have changing rooms, lockers and are equipped with amenities like hairspray, bobby pins and more. Most of the studios also provide camera (equipment) and Cosplay accessory rental.

Share Photostudio
Picture by Meermiau

The most important things you should know:

1.     Cosplay photo studios are not made for foreigners.
If you cannot speak Japanese, you should learn it or take a Japanese speaking friend with you.
At some studios you need to fill out Japanese forms to get in.
English speaking staff is very rare (like everywhere in Japan). I once visited a studio with friends and the staff where searching non stop for me, because they wanted to speak with my friends. Although my friends are very considerable they nearly got kicked out. Japanese studios have a lot of rules and most of them aren’t obvious. Of course the rules are displayed but only in Japanese.
I also red that even Japanese students or people who lived several years in Japan had problems regarding to the forms and communication. So be prepared.

If you cannot bring a Japanese speaking friend or speak Japanese there are a few studios which are used to foreigners. You can recognize them easily: they offer an English website and reservation. But be aware that English website doesn’t mean that the staff can speak English.
I would recommend Studio crown in Akihabara (Tokyo). A friend of mine owns this studio. She can understand German and speaks fluently English, because she lived abroad.
Her studio also offers a special Cosplay dressing and photo service for foreigners.

2.     Also be aware that you need to book some studios before head.
The website is mostly Japanese and due to security reasons and pictures as buttons you cannot translate via Google translate (or other services) easily.
My Japanese friend recommends always reserving the studio before head. At some studios you need a membership to get in. The reservation progress can be very complicated and might require a Japanese address or phone number.
We couldn’t reserve before head, because my friends couldn’t create an online account so we just walked in. I guess, as long it is a share studio and you are going for a normal working day it should be fine. If you want to get a private room or to shoot on holidays you should reserve.
Of course it depends on the studio itself.

3.     Always dress up at the studio and change back to your normal cloths after the shooting.
In Japan there is an unspoken rule to change at the location itself.
If you come dressed in Cosplay they might refuse your entry.

The studios are providing a changing room, lockers and a Cosplay friendly environment. You should know that the changing room will be a big hall where everyone will sit on he floor and change.
You should bring a small mirror and try not to spread you things too much in order to leave as much space as possible for other visitors.

4.     Don’t cut your wig in the changing room and always clean your shoes before entering a setting.
Sometimes you even have to put off your shoes.They mostly provide special tissues for the shoes, a shoe shelf and rooms for wig cutting. Some studios also have rules regarding to the skirt length or that you have to wear a shorts under your shirt.

If you are the one taking pictures, be aware that there are often regulations regarding the camera equipment. Because some settings are the hallway itself (which everyone uses to move around) you are maybe not allowed to use more than one soft box and only a limited number of flashes.

5.     The most studios don’t provide a photo service.
Japanese Cosplayers are mostly visiting the studios in a group and are taking pictures of each other.
It is quite uncommon to come with your own photographer.
You can rent a camera + equipment at the studio itself. Cosplayers at a studio normally don’t communicate much with other Cosplayers and are staying in their group.
So if you want to make new friends a studio might be the wrong place.

The studios

Japan has a big variety of  Cosplay photo studios. You can mostly rent them for 1 hour, 3 hours, half a day and a whole day. Some rental time does include your changing time some not. Just be careful to check it if you are going for a Cosplay that takes some more time to change in order not to use up your precious shooting time.

You can divide the studios into 3 different main types:

1.     The share studio
At the share studio you are paying an entry fee per person and are free to use every setting which is not occupied.
You are paying an affordable fee and can use a lot of different settings. It is kind of “all you can shoot”. If you forgot to reserve you can try to get a ticket right on that day and hope that there are still tickets left.

The disadvantage: If you want to use a certain setting you might have to wait and you cannot occupy a space for several hours, because other people might wait for this certain setting (Japanese people won’t wait obviously).
Because some settings are placed at the hallway and you are sharing the space with other foreign people. You have to obey a lot of rules and always have to consider other Cosplayer using this studio.

Price range:
About 1.000 en (1 hour) to 5.000 yen (10 hours)

Picture by Meermiau

2.     Private studios
You also have the possibility to rent a private studio.
You are paying a fee per room (or a group of rooms). Because you are renting the room for your usage only, be prepared to pay for it.
Because you are paying per room, you have the possibility to invite friends for a shooting and to share the costs. Although it is expensive at the first glance it might become affordable. If you want to rent a private studio, a reservation is required and a reservation in Japanese might become very challenging.

It might be more expensive than a share studio, but you can use the place more freely without worrying about other foreign Cosplayers and disturbances.
Because the share studios are cheaper, you will find a lot of pictures taken at the same setting again and again. So if you are searching for a more unique setting, I would recommend going for a private studio.

Price range:
About 3000 yen (1 hour) to unlimited

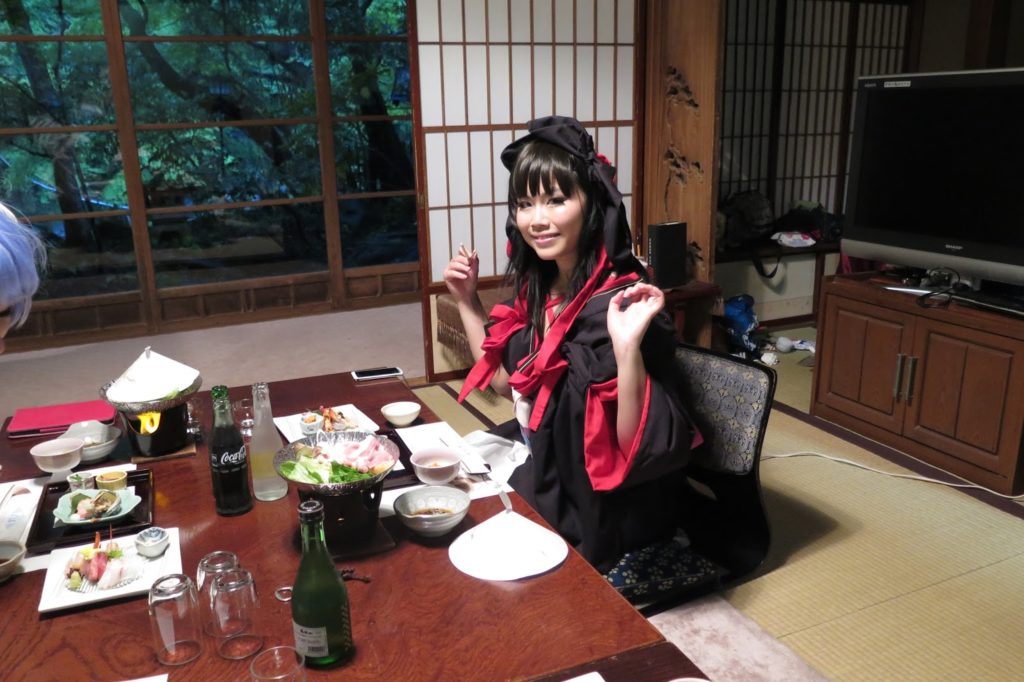
Shooting at a Hotel

3.     Hotels
Some Hotels are offering a Cosplay photo studio service next to their main business. Or if you are going to stay in a very special hotel /Ryokan just ask them if you can shoot there.
You are just booking a room (mostly special furnished ones or with features like a pool) and just use it as a shooting location. Some hotels are offering their rooms for rental at the day time and for staying at the night time. Some Hotels also offer both.

Normally you are paying per room (or per person if you also want to stay in this room). They are mostly not equipped with rental services, don’t have Cosplay related staff and changing rooms.
Bear in mind that their main business is not to be a Cosplay studio. But these rooms are mostly equipped with an en suite bathroom. So changing and getting ready is possible in a private environment.
You also can share the hotel room to save money and to stay over with friends after the shooting. It is a nice combination if you want to spend a night in a nice Hotel and to take some pictures.

Price range:
About 4000 en (1 hour) to unlimited

Renting things:

In Japanese Cosplay studios you can rent camera equipment, light equipment and a variety of accessories.
So you don’t have to bring more than Cosplays and Make-up. It is a quite comfortable service particularly if you are coming from oversees and struggle with your limited baggage space.

1.     Cameras and equipment:
The most studios offer free reflectors and are using artificial day light to light up the studios. But if you still want to use a soft box or flash you can rent it right at the studio itself. Nearly every studio also offers a camera rental.
Some studios are only providing Nikon or Canon equipment. So it might be difficult to get a fitting flash.
I also saw that the prices are varying from studio to studio. Some studios are offering a free rental for 2 hours, some 300 yen per hour, and some 300 yen for a whole day. So be sure to check the prices in order to get the equipment you want and not to spent a fortune.

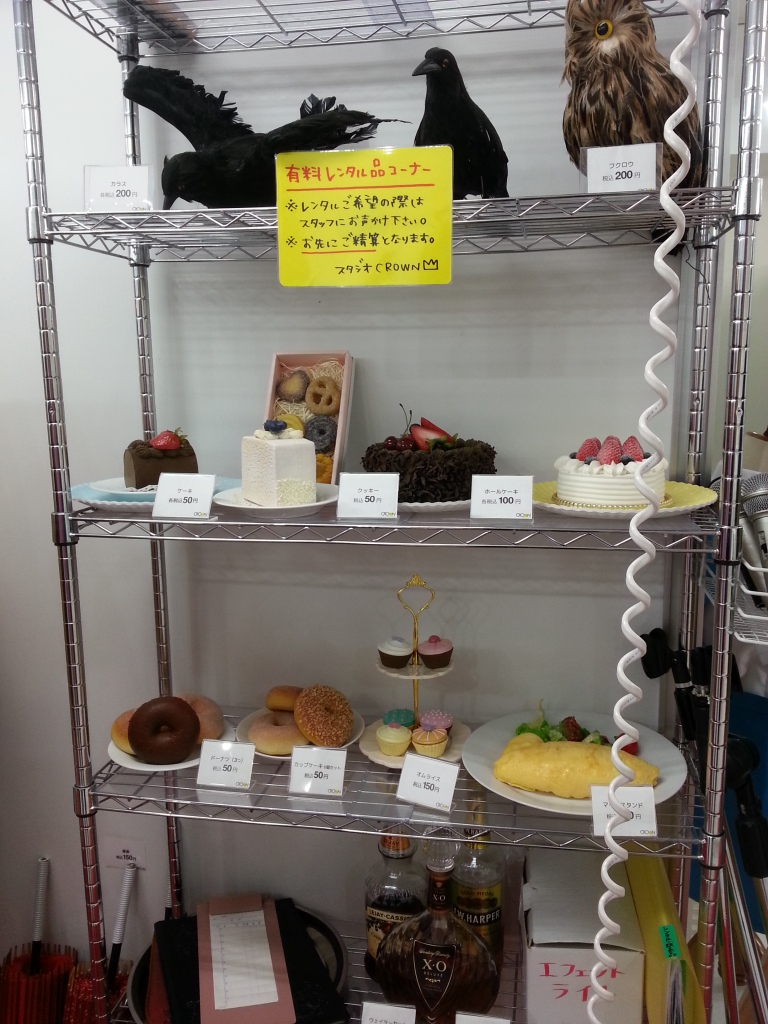
Rentel items at studio crown

2.     Cosplay accessories:
Most of the studios are offering a rental service for Cosplay accessories like micros, schoolbags, fake food, umbrellas etc.

This service also varies from studio to studio. While one studio might offer a very limited choice the other studio might have so many accessories, that you have difficulties to choose. Some studios tend to give them out for free, while other studios charge you per item.
I really love to use accessories so I tend to choose my studios (next to the entry fee and settings) based on the variety of accessories. Until now I only used studios which are giving their Cosplay accessories out for free.

Also be careful when you are choosing a studio. The entry fee might be very cheap but if you intend to rent equipment or additional items it might be cheaper to go for a more expensive one.

I hope that this guide might help you for your next time in Japan.
I really recommend every Cosplayer to visit once a Cosplay photo studio. Compared to Germany the shooting possibilities seem unlimited.
It is really a great feeling to shoot at a Cosplayerfriendly environment and to shoot at special locations freely without worrying about publishing rights, unaffordable fees and people who are not familiar with Cosplay.

Next time I will right about the Cosplay studio and the Hotel I used during my last Japan trips.

Shopping for Cosplay part 1: Shopping in Taipei

Shopping for Cosplay part 1: Shopping in Taipei

 Japan is the country of Anime and Manga.
And of course of Cosplay!
One of the main purposes of my last trip was to go shopping for my World Cosplay Summit Cosplays for next year in Japan.
We not only visited several Cosplay related shops in Japan but also in Taipei and Dubai.
All countries have a large choice of fabrics, wigs and other small materials like laces or gemstones.
Part 1: Cosplay shopping in Taipei:
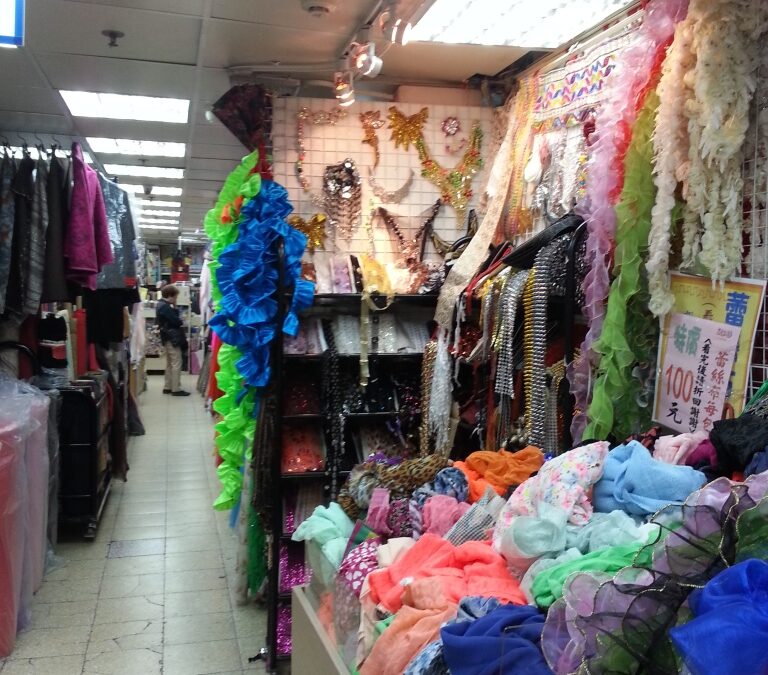
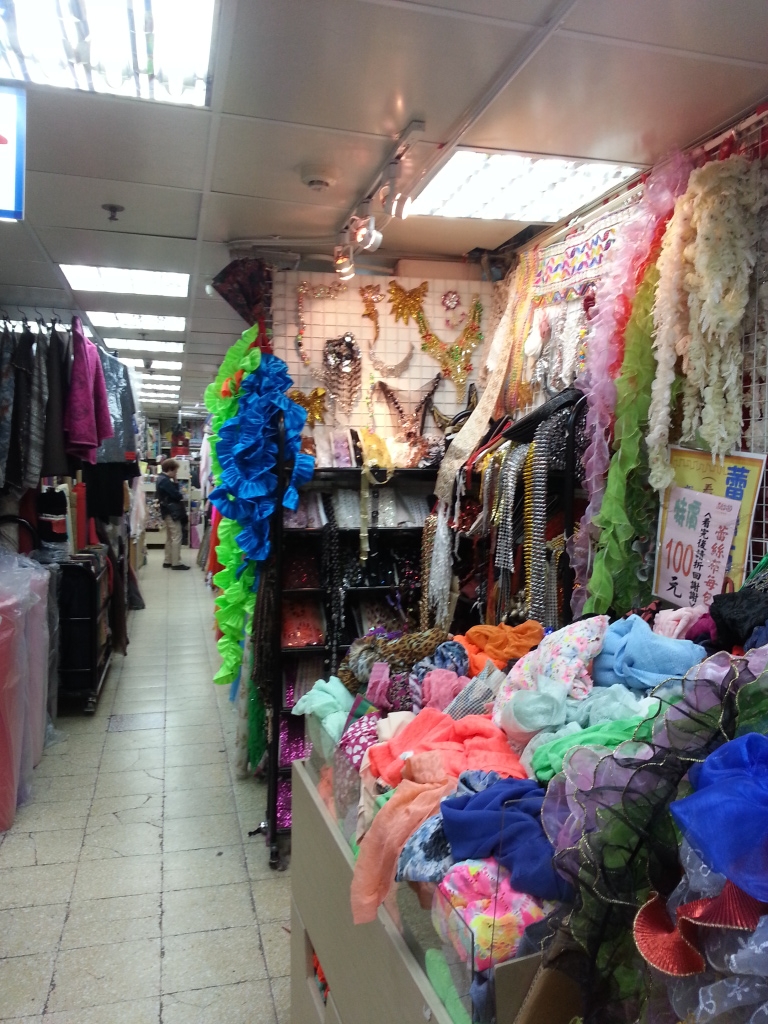
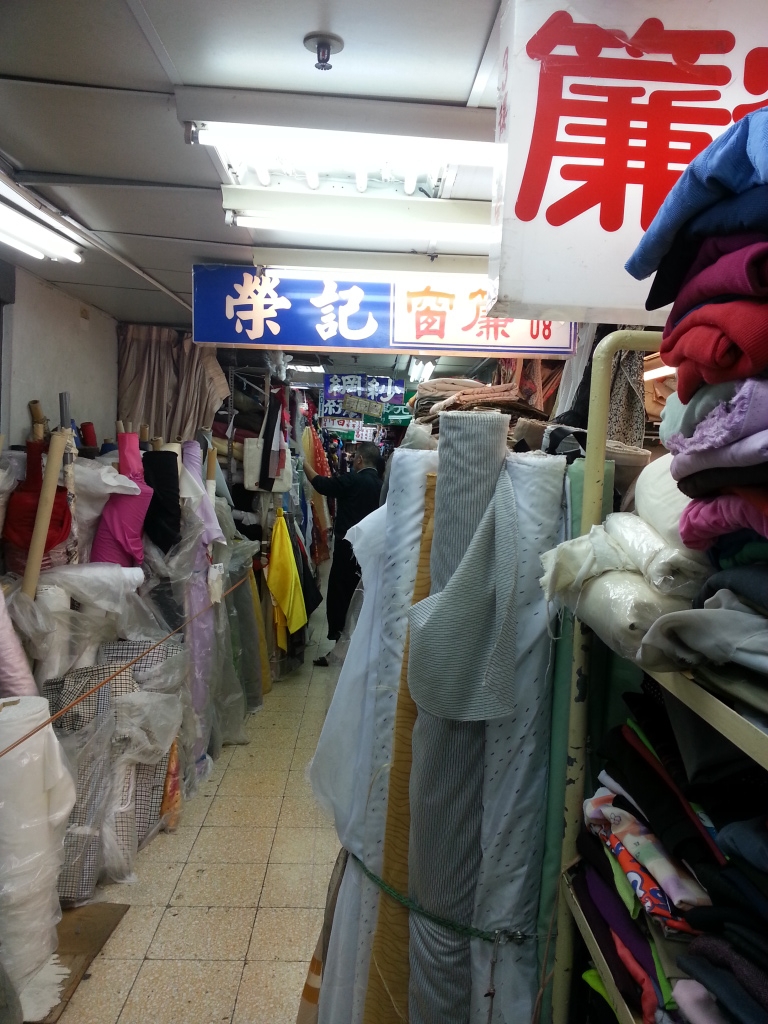
Taipei is well known for cheap and good quality fabrics. We visited the
Yongle Fabric Market and found a large choice of fabrics and dry goods such as laces or gemstones.
The most fabric shops are located directly in the market at the 2nd floor. If you are looking for dry goods you should leave the market and take a look in the side roads.
Be aware that nearly no one speaks English
and that they are making different prices for foreigners. If you can
speak Japanese you can be lucky. We communicated mostly in Japanese or
just pointed the fabrics we wanted
to buy (this only works if you don’t have any questions…). You can
bargain if you are buying a bigger amount of fabrics, because there are
no prices shown. Special fabrics, like embroidered ones or Chinese ones
where quite cheap. But if you want to buy normal
unicolor fabrics be aware that it could be more expensive than in Japan
or Germany.
Generally speaking: Fabrics in Taipei are more expensive than in Japan-
But if you are looking for high quality and special fabrics you can make a good deal.
The dry goods had all price tags. Bargain
wasn’t possible, but if you are buying a bigger amount they just give
you some free dry goods. We could found a lot of awesome stones and
special accessories for Cosplays for
a very good price. We weren’t satisfied with the choices of laces and
most of the shops sold the same items. Also be aware that high quality
stones and gold laces are easier to get in Dubai for a cheaper price.
We were very disappointed regarding to wigs in Taipei. We only found one shop who offered cosplay wigs for order.
Because we had only a limited time in Taipei we didn’t looked further for Cosplayshops.
But we got the advice that you can buy good Cosplay accessories in Ximending.
Yongle Market Taipei
Operating Hours: Mon-Sat 10-18 hr
Next MRT Station: Beiman Station
How to take good cosplay pictures (Cosplay)

How to take good cosplay pictures (Cosplay)

Recently I am rarely using my webside, I am posting mostly at facebook or using other social media.
I want to change it and write more about cosplay at my blog.

I started cosplaying 2006. I was a beginner like everyone and needed to learn beneath sewing a lot of things. Even after nearly 10 years of cosplaying, I still need to learn a lot and are struggling with the “cosplayerproblems” everyone has.
I am not perfect but I want to learn and to continue having fun at cosplay.

Recently a lot of people asked me for advices for cosplay shootings.
Thats also why I was thinking about starting to write about cosplay.
I wasn’t quite sure if I should post these advices, because I don’t think I am really fit to give them. I am also just a cosplayer who loves her hobby. But I decided to write this post in order to give you a view of my way of “cosplaying”.
I also want to state that this is my way of doing things. It does not mean they are right or the only way. I am also still learning (that’s why I am not sure if I am fit for this post…).

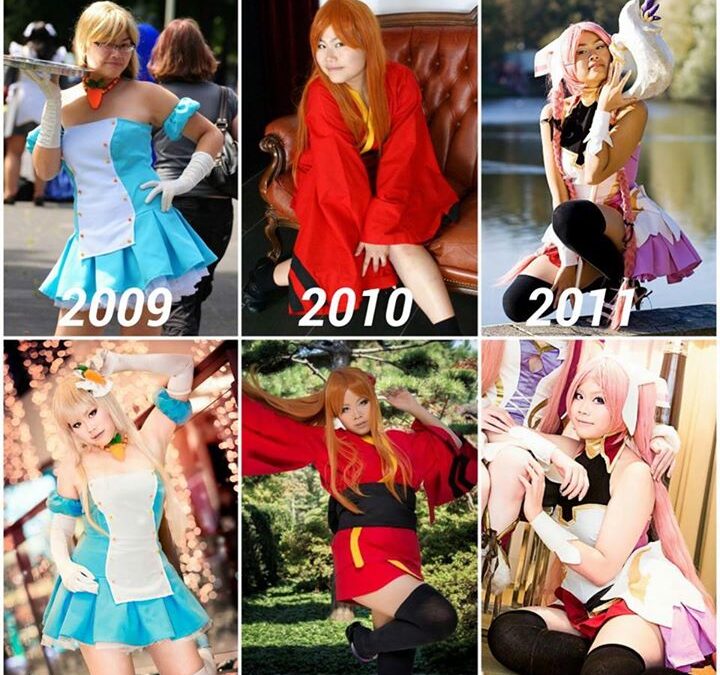
In these pictures you see the same cosplays with the same wig and accessories! (Only the wig of the first cosplay is new, I lost it…).
I decided to reshoot these cosplays and realized that I made a huge step.

When I was a beginner, I only cared about the “clothing”. I didn’t pay much attention to the wig, the make up, facial expression or posing.
I just cared about the “wearing part” and forgot the whole “being” part. Since I started to make more and more photo shootings I realized that cosplay is not only about the “costume”, it is also about the “play”. I love the characters I am cosplaying so it became more and more important for me to “play” this character.

(Btw: I am speaking about a male photographers and female cosplayer, that is because I am working mostly with male photographers. It does not mean it couldn’t be a female photographer )

–> Before the shooting:

1. Find a photographer
A lot of people told me, that the main problem is to find a suiting photographer.
It is not easy, but it’s up to you!
Choose your favorite photographer based on his pictures (do I like his style?) and ask them via direct message or at conventions.
The typical way is to make a small shooting at a convention and event before having a private shooting.
Make clear what for a shooting you want to do, when and where, which cosplay?
If you have pictures, show them! The photographer can get a better picture of you and your way of cosplaying.
It’s not easy, time consuming and I got declined a lot of times.
But I didn’t gave up and found some photographers which I really like to work with on a regular base.

2. Speak with your photographer
 What cosplays does he like? Does he have preferences? Where and when do you want to meet? Outdoor or Indoor? Do you need a special location?
Does he need any assistants? Does he edit the pictures or do you need to edit them?
Speak with him and plan. This way you can prevent a lot of miscommunication.
And again check his pictures before to get an idea of his style and preferences.
It’s also a chance to become acquainted with your photographer.

3. Location

 The cosplayer knows the most things about her character, also which location is the most suited one. I am normally doing the location scouting and asking for permissions. The photographer does not have much knowledge about your character and the anime. He maybe can give you a hand but that’s all.
If you are going to shoot in the city of your photographer, he might know some good locations. But he just can give you advices, not more. (Of course it is different if he knows the character).
Normally I am thinking about the character I want to shoot, speak about it with my photographer and look via internet for a good location.
If I found something I mail or phone them and explain what I want to do at this location.
You might pay a certain fee, to be able to shoot at this specific location.

4. Be nice to your photographer

 
He takes his time for you and maybe traveled a long way only to shoot you.
Most photographers are shooting you for free and are doing this next to their 40 hours a week job and private life.
Don’t forget that they are shooting you volunteeringly. Don’t take it for given!
Give them time to finish the pictures. Alone to select the pictures can take hours! Also editing is a very time consuming task. Just wait and be patient.
Talk with him about the rights. Is it okay to use them at Facebook? To make Coscards or to post them at Worldcosplay? Be aware that you are giving Facebook the right to sell the pictures if you upload them!
If you need pictures without watermark or want to “erase” your dark circles. Ask them!
I never had any problems; they all allowed me to make small corrections or to use the pictures.
Just ask, I am sure they don’t mind and It’s a matter of respect!

–> The Cosplay:

1. Prepare your cosplay properly
Finish you cosplay in time and wear it the way you want to see your cosplay in the pictures.
Of course your photographer can change the hair color, eye color or edit small mistakes away. But be aware that these things are taking a lot of time and most of the photographers are editing the pictures next to their main job and private life.
Don’t take it for given that he will edit the pictures for you. Give him a hand and make it easier for him!

2. Wig
Pay attention to your wig. If you are buying a wig you get the wig unstyled.
You mostly need to cut and style the wig, especially the bangs. If you transport your wig in a plastic bag restyle it before a shooting.
If you are taking pictures, tell your photographer how the wig should look like. He can help you to keep your wig in place even if you don’t have a mirror.
If you are wearing a long wig, brush, brush, brush!!

3. Make up
I tended to wear no make up or always the same for cosplay.
I realized that you really need to pay attention to the facial features of your chosen character. Face shaping is a very important thing, especially while crossplaying. Flashlight takes away all you facial contours. So point them out with make up.
And don’t forget your eyebrows! They are very important for changing your face.
Also be aware, that colorful wigs will “eat up” your eye shadow and blush.
It might looks overdosed at the first glance, but with your wig you will have a natural and balanced look even if you have tons of color in your face.
For shootings its much more important. Your make up might look exaggerate in the mirror but will look totally natural at the picture. Don’t underestimate how much the camera, flashlight and wig will “eat up” your make up.
I recommend circle lenses and fake lashes.

—> While taking pictures:

1. Posing and facial expression
Every character is different; every character has its own vibe. The more you know about your character the merrier you can “play”.
Make researches about your character; does he have typical poses? Is your character more the arrogant or cute type?
Think about it and try poses and facial expressions in front of a mirror! Not everyone can make the same poses. I always need to lower my chin, because I have a chubby face and want to make it appear more “longer”. I also cannot smile too much, because I am showing too much teeth ridge. And yes… I needed a loooong time to realize that.
So be aware of you positive features and use them as much as possible.
I also tended to make poses, which hid my cosplay. You spent hours to make that cosplay so show it! It would be sad if you only have pictures, which are not showing you hard work.
Practice, practice, practice! I always though that I cannot crossplay or cosplaying arrogant characters, because I am not able to mimic them. I still struggle with arrogant or manly characters but are trying to improve my posing and facial expressions.
Don’t give up. No one is born as a perfect cosplayer!

2. Speak with your photographer.

 Do you have ideas? What pictures do you would like to make? Check the pictures, speak about them and try it again.
You will be more satisfied with your results and have more fun.
Trust me, if you are making shootings communication is the key!
Tell him about you preferred poses and your “positive features”, remind him to lighten up your face properly and not to make pictures in the direct sun.
You are also responsible for the results.
Check the pictures and speak about them during the shooting with your photographer!

3. Have fun.
 Cosplay is not about others! Cosplay is about you!
You don’t need to prove anything; you don’t need to force yourself!
Do it to have a great time, to have fun, to make new friendships and great memories.
If you feel uncomfortable, just don’t do it. But don’t forget and respect the wishes of your photographer!
The most important thing is that you are happy and satisfied with your work.
Don’t force you to something you don’t want to do and don’t force others.
If you are doing cosplay with fun, the results will show it.

I am not even near to be a perfect cosplayer and still have to learn a bunch of things.
I just wanted to give some advices, because I needed a lot of time to realize these things.
This is my way of cosplaying, it doesn’t mean it’s the right or the only way.

 It’s just the way I chose and I am happy if I can help you in some small points!
I wish you a lot of fun for your next shooting!

Thanks @yukan-graphy, meermiau, Silvermillenium, manga Box, chiko-chan for the pictures!

Coscard Tutorial

Coscard Tutorial

Da
beim Cosplaypodcast die Frage auftauchte:
~>
Was sind Coscards? Braucht man die?<~
Dachte
ich, ich erstelle ein kleines Tutorial über diese mysteriösen Karten. ^_-
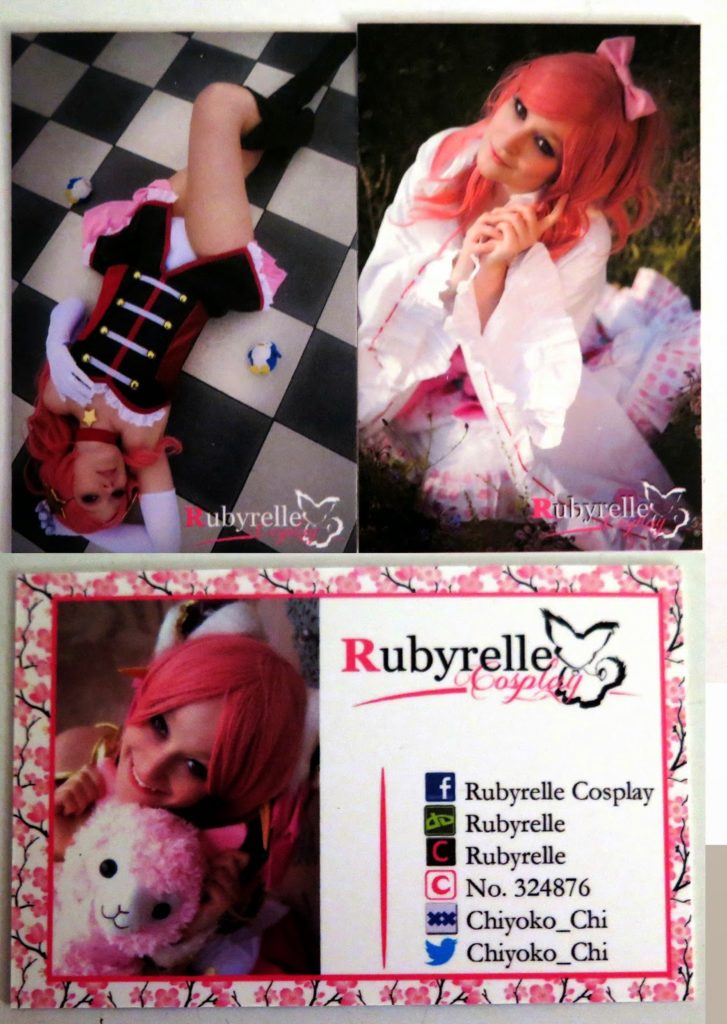
Rubyrelle->https://www.facebook.com/Rubyrelle.Cosplay

>~ 1. Was sind Coscards?

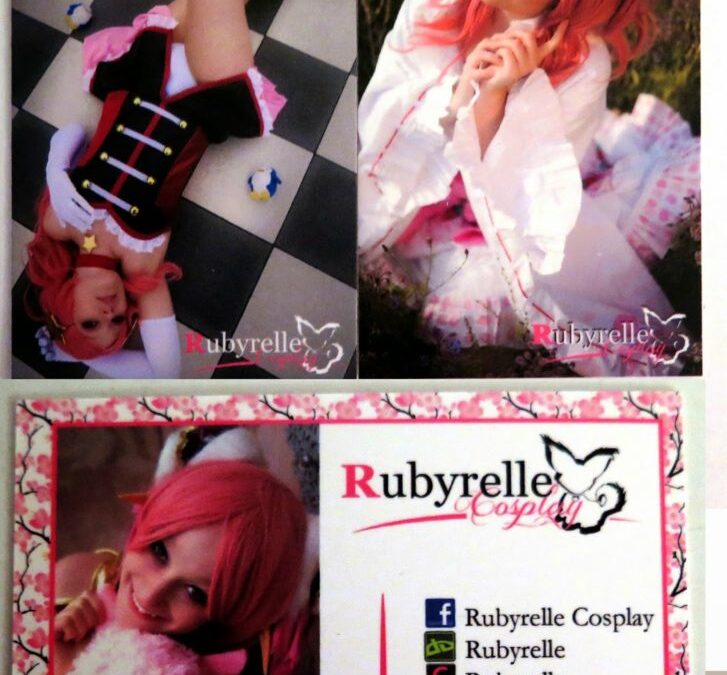
 Coscards sind einfach gesehen
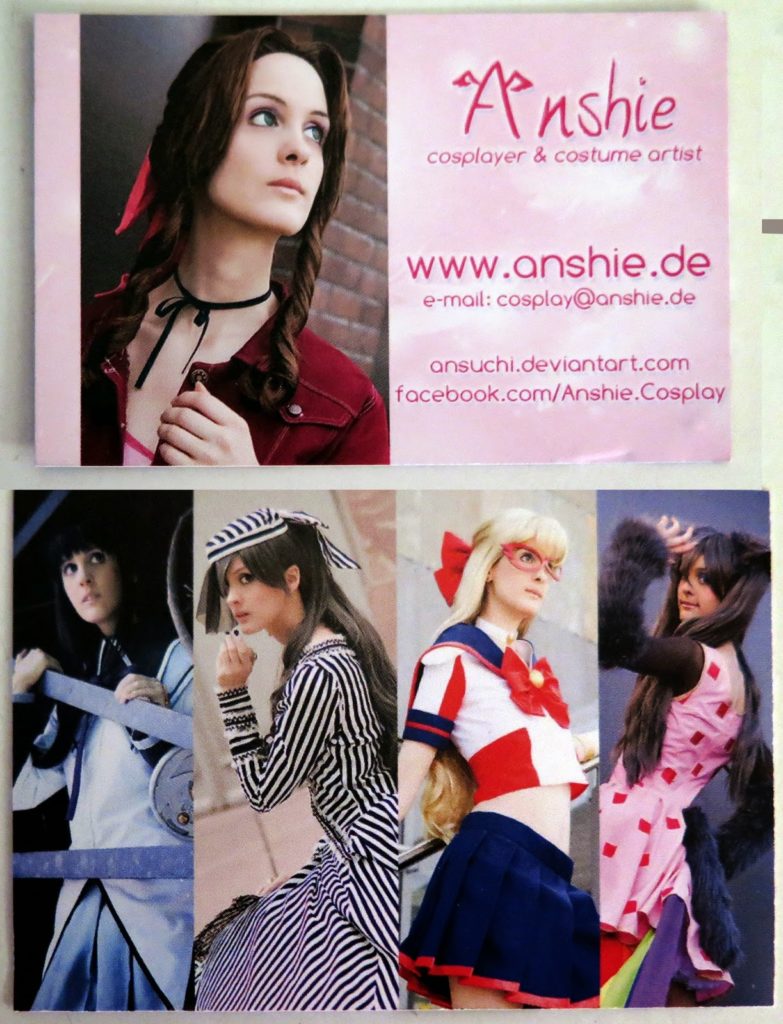
Visitenkarten“ von Cosplayern.
Auf der Karte stehen meist Kontaktinformationen des Cosplayers drauf.  
Z.B. Name/ Nick , Homepage, Facebook, Twitter, E-Mail etc…
Der Cosplayer kann dabei selber steuern
welche Daten er dabei freigibt.
Der Unterschied zu normalen Visitenkarten
ist, dass auf der Visitenkarte 
ein Foto des Cosplayers (in einem Cosplay seiner
Wahl) abgebildet ist.
Coscards sind in Asien sehr verbreitet, wo man innerhalb von kürzester Zeit sehr viele neue Menschen trifft, kennenlernt, fotografiert oder fotografiert wird.
>~2. Braucht man die? 
Anshie ->https://www.facebook.com/Anshie.Cosplay

Jedem ist es selber überlassen, ob man sich
Coscards anschafft oder nicht. Es ist jedoch sehr praktisch Fotografen oder
neuen Bekannten
auf dieser Art und Weise seine Kontaktdaten zu geben. Man
tauscht einfach seine „Visitenkarte“ aus, anstatt sich den Namen irgendwo zu notieren.

Der, der die Daten erhält, kann sich dann aussuchen über welchen Weg er seinen
neuen Bekannten kontaktiert oder den Cosplayer auf den Fotos makiert.
Außerdem ist es oft für neue Bekannte und
Fotografen
einfacher, sich jemanden anhand eines Gesichtes zu merken. Das
Cosplayfoto auf der Coscard ist also gleichzeitig auch eine kleine Denkstütze.
^_-

In Asien ist es mittlerweile so weit, dass bekannte Cosplayer ihre Coscards signieren und an ihre Fans weitergeben.
>~3. Wie
sehen sie aus?
Meist haben die Coscards
Visitenkartenformat (85 x 55 mm). Es gibt jedoch auch die Möglichkeit davon
abzuweichen.
Ich habe auch schon Coscards gesehen, die
wesentlich schmaler waren als die übliche Visitenkarte oder Quadratische.
Gestalten kann man die Coscards wie man möchte. 
Wichtig ist natürlich, dass die gewünschten Kontaktdaten zu finden sind.
Die Coscards sind meist vollfarbig und
zweiseitig bedruckt.
(Es gibt jedoch auch einfarbige).
Meist sind die Kontaktdaten auf der
Vorderseite
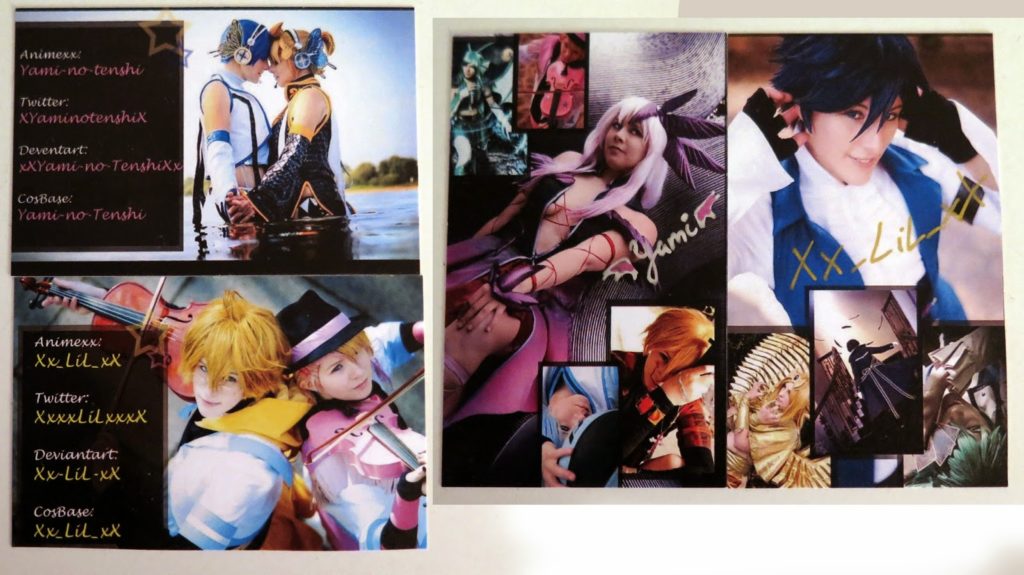
, während ein Cosplayfoto die Rückseite ziert.
Da es viele sehr schöne und aufwendig designte
Coscards gibt, sind sie ein begehrtes Sammel- und Tauschobjekt.
Daher hat sich auch das Visitenkartenformat
durchgesetzt. Viele Cosplayer und Fotografen sammeln diese Karten in
Sammelbücher oder Boxen.
Yami-no-Tenshi-> http://worldcosplay.net/member/Yami-no-tenshi /XxxxLilxxxX-> http://worldcosplay.net/member/73166

>~4. Welche Kontaktdaten gehören rauf? 
Auf Coscards gehören normalerweise nur Kontaktdaten zur Onlinepräsenz des Cosplayers. 
Für eine einfache Kontaktaufnahme reichen diese Daten völlig aus. 
Ich würde davon abraten private Daten wie Adresse und Telefonnummer auf die Coscards zu drucken. Man weiß nie wo diese Daten letzendlich landen und sollte bedenken, dass es doch irgendwie Fremde sind, denen man die Daten gibt.
 
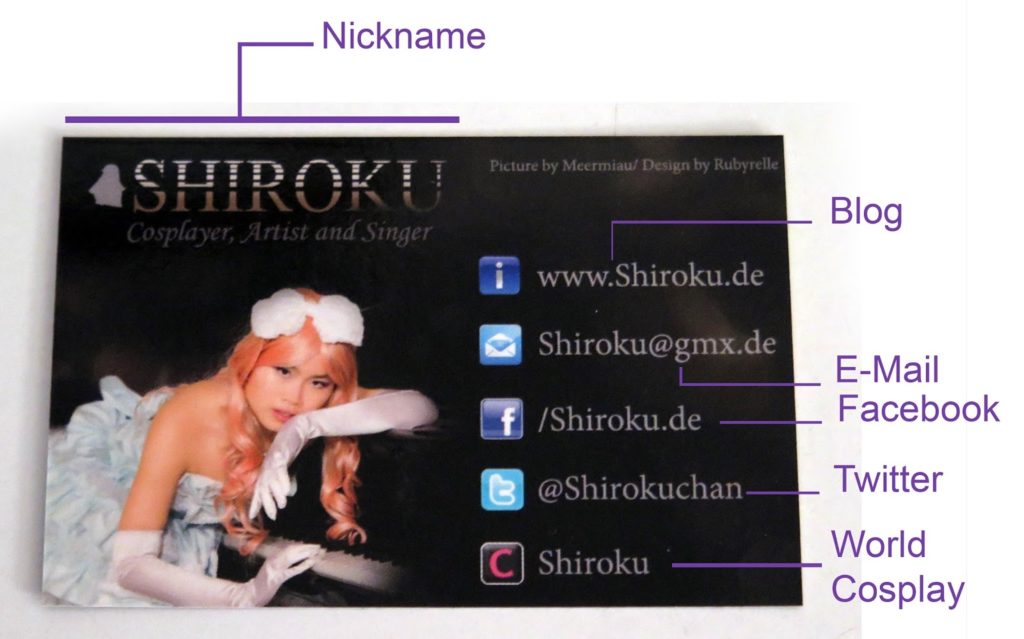
Üblicherweise findet man auf den Coscards:
  • Nickname/ richtiger Name
  • E-Mail
  • Homepage, Blog, Facebook, Twitter
  • Cure Cos, Cosplay.com, Worldcosplay
  • Deviantart, Animexx, Cosbase
>~5. Und
wo kann ich solche Coscards machen?
Die Grunddateien für die Coscards (bzw. das
designen) werden meist selbst in Photoshop oder ähnlichem erstellt. Diese
Dateien werden dann bei dem Copyshop nebenan oder im Internet (Druckshop) gedruckt.
Falls ihr da Hilfe braucht, können euch
bestimmt Freunde mit Photoshopkenntnissen weiterhelfen.
Es gibt die Möglichkeit verschiedene
Coscards
zu einem Preis drucken zu lassen.
Das bedeutet, dass die Vorderseite mit den
Kontaktinformationen gleich ist, aber auf der Rückseite unterschiedliche Cosplayfotos abgebildet sind.
Separat verschiedene Coscards zu drucken
ist immer relativ teuer.

Es gibt jedoch Anbieter, wo man
verschiedene Rückseitenmotive in einem Vorgang drucken lassen kann. 
Meist ist es günstiger, als die Coscards
separat in Auftrag zu geben.

>~6. Links

Coscards mit
unterschiedlichen Rückseiten drucken lassen:

-> http://uk.moo.com/de/

Hier kann man Visitenkarten drucken lassen:
Tutorial um Coscards zu erstellen (Einseitig u. Englisch):

>~Vielen Dank, dass ich die Coscards verwenden durfte:
-> Rubyrelle: https://www.facebook.com/Rubyrelle.Cosplay?fref=ts 
-> Anshie:    https://www.facebook.com/Anshie.Cosplay?fref=ts 
-> Yami:        http://worldcosplay.net/member/Yami-no-tenshi
-> Lil:            http://worldcosplay.net/member/73166

Falls noch Fragen, Ideen, Kritik und
Anregungen bestehen:
Immer her damit ^_-.