Apr 5, 2018 | Cosplay Tutorial, Travel, Travel Reports |
Okonomiyaki:
Okonomiyaki is often described as a Japanese pizza. It can be filled with various Ingredients like fish, cheese, bacon, ricecake or different vegetables.
Normally its made on a hot plate (Teppanyaki), but because I sadly live in Germany I developed my own way to make Okonomiyaki in 2 fry pans.
You can change the filling to your liking, although cabbage is more or less the filling you will found in nearly every Okonomiyaki.
I love noodles, this is why I went for a Yakisoba base. You can also skip the Yakisoba part and go with a plain egg base. ^_-
Ingredients (6 portions)
For the batter:
1,5 cups fleur
2 cups water
1 small bag of Dashimoto
oil
Filling:
Pizza Cheese
1/2 cabbage
Champignons
Bacon stripes (12)
6 eggs
3 packs of Chuuka soba
Okonomiyaki sauce
Mayonnaise
Yakisoba sauce
Bonito flakes
Nori flakes
As for the Yakisoba/ Okonomiyaki sauces: I like to use the brand “Otafuku”. I tried out various brands and just love the taste of this sauces. You can also make the sauces by yourself.
Preparations:
1) Cook the Chuuka soba and mix the soba with the Yakisoba sauce (like instructed on the package).
2) Chop the vegetables into small pieces.
3) Mix the Dashimoto, water and fleur until the lumps
disappeared.
Now we can start!
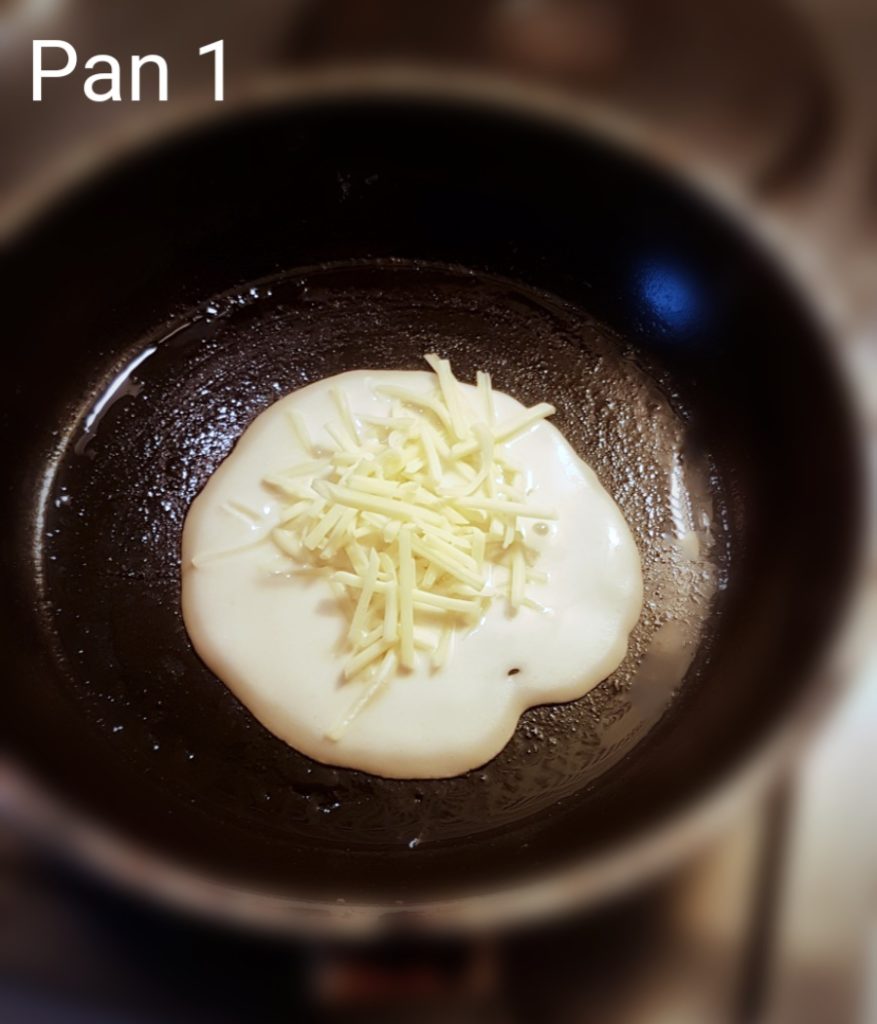
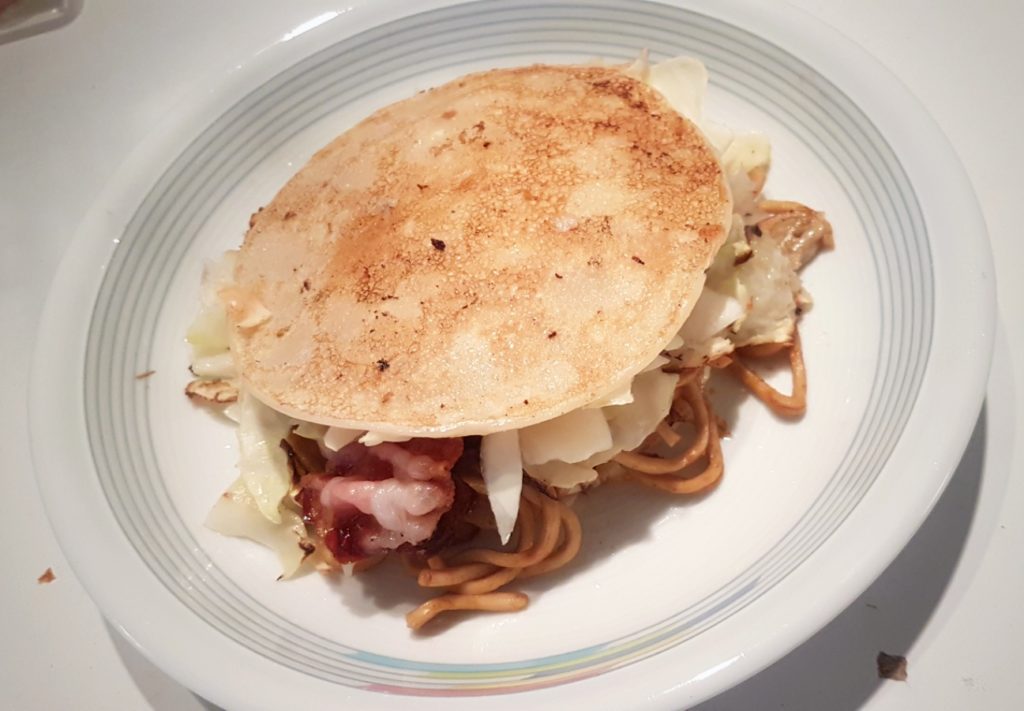
1) Pan 1: Fill some batter into the pan, wait a bit and top it with cheese
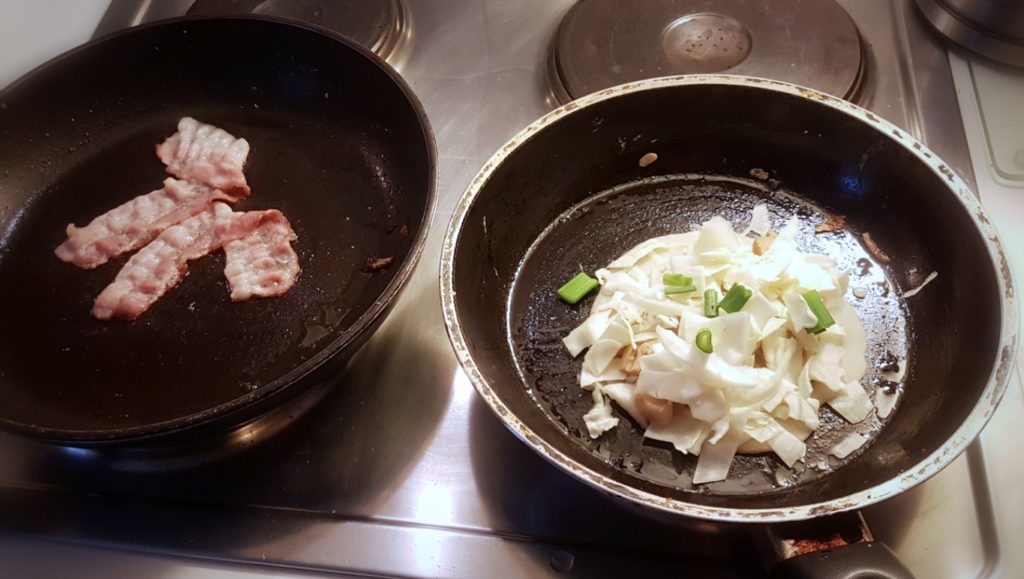
Pan 2: Fry the bacon until its crispy
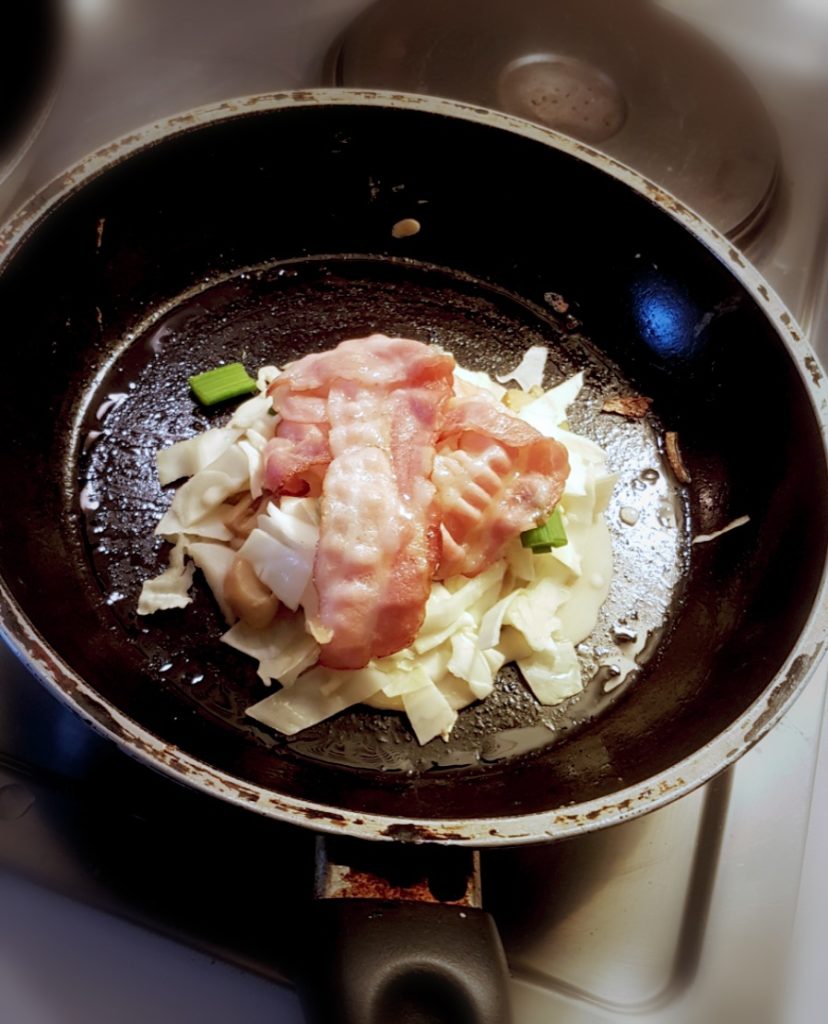
2) Pan 1: Top the Batter with Cabbage, champions. Add some batter on the top and afterwards the bacon.
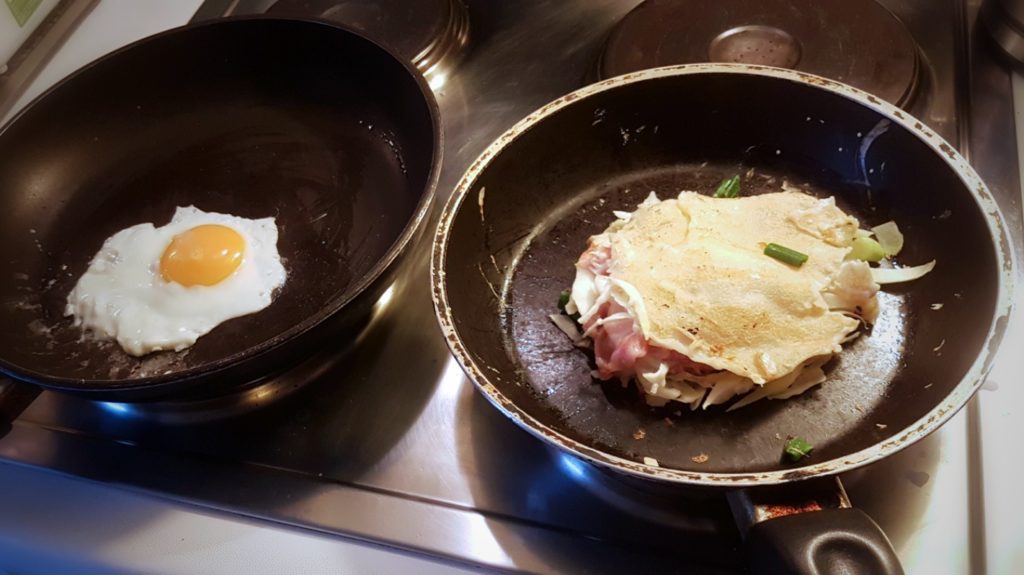
Pan 2: Fry 1 egg
3) Pan 1: Flip the whole thing (if some cabbage drops out, just push it under the batter after flipping). Wait until the cabbage is more or less cooked (to your liking).
4) Pan 2: Put the egg onto a plate. Top the egg with the prepared Yakisoba.
5) Pan 1: Take the batter and put it on the yakisoba.
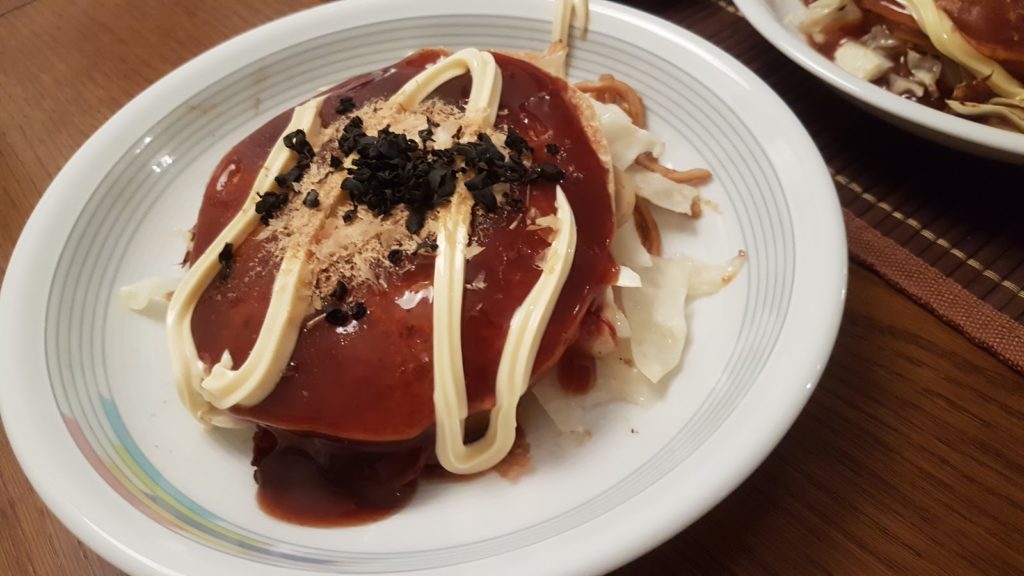
6) Decorate it with Okonomiyaki sauce, Mayonnaise, Bonito and Nori
Enjoy!
Some hacks:
1) If you don’t like raw cabbage, fry it before adding the cabbage to the batter
2) If you use 2 pancake turners, its easier to flip the Okonomiyaki
3) Press the Okonomiyaki with the pancake turner in Step 3) from time to time in the pan.
Also press the Yakisoba on to the Egg after step 3). If you flatten it out, its easier to eat afterwards and don’t look like the tower of Pisa.
If you have any questions don’t hesitate to ask.
And no worries this will not become a cooking blog.
Im not good at cooking at all. Actually Okonomiyaki is the only food I can make. XD
May 8, 2017 | Cosplay, Cosplay Tutorial, Travel |
After my visit in Munich I decided to visit with Meermiau the photostudio “Dein Mietstudio” at Kircheim unter Teck (near Stuttgart).
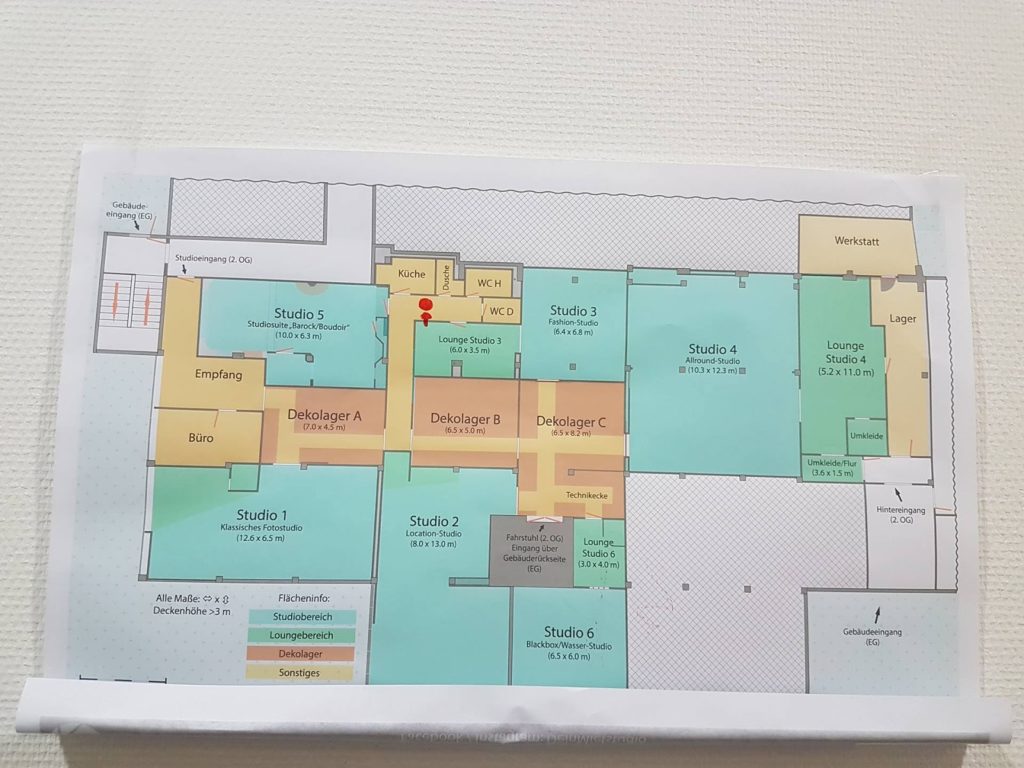
The studio offers 6 different studios:
-> Studio 1
The 55 qm big studio offers a white seamless backdrop.
-> Studio 2
This studio offers 13 different basic settings as well as a small part for seamless backdrops (grey, white, black) at over 102 qm.
-> Studio 3
Is the smaller brother of studio 1 and offers a white seamless backdrop at 44qm.
-> Studio 4
This is with 180 qm the biggest studio they are offering. This studio has 7 different basic settings and also offers seamless backdrops in grey, white and black.
-> Studio 5
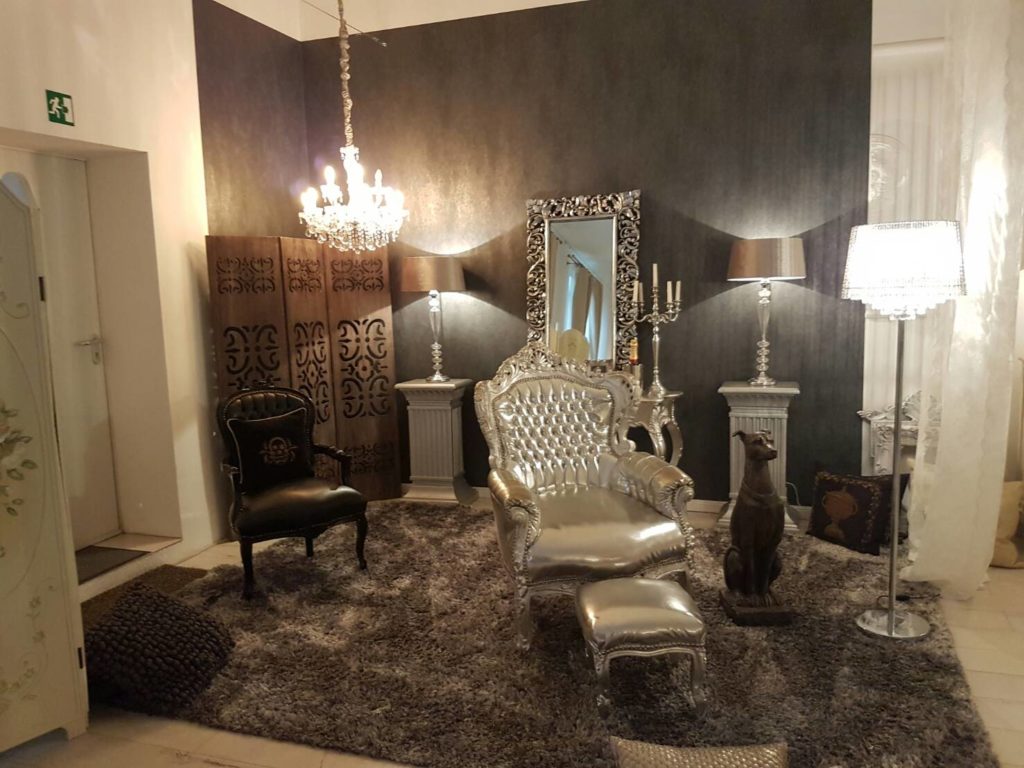
Is a 63 qm barock suit in light crème colors, with a big bed, tables, chairs etc.
-> Studio 6
You can rent the smallest studio (40 qm) as a black box studio with a seamless backdrop (white and black) or use it for water photo shootings.
The studio is located at the 2nd floor in an industrial building. Sadly there is no elevator. So if you have a lot of equipment be prepared for an extra sport lesson.
You can rent the studios for minimum an hour and have the exclusive usage of them for the rental time. You can rent the studio at their homepage.
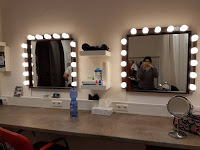 |
| Changing area |
All rooms are equipped with a music system, changing room with mirrors and amenities, a wardrobe, chairs, table, coffee machine (also latte Macchiato, Cappuccino etc) and drinks (for a small extra free). Every room has his own light/ flash equipment set which you can use freely (included in the rental).
Some studios are including a parking place in front of the studio (Studio 1 and 2). If your studio don’t have a parking place, you can park your car near to the studio for about 3 Euro a day.
The studio rooms are your private space until the renting hours are over. Unlike at other photo studios the owner wont interrupt you unless you call him with the phone, you can find in every studio.
If you rent a studio you are free to use the requisites to your liking. Just be sure to bring them back afterwards.
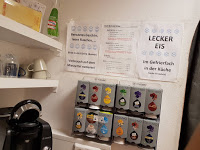
For the waiting time you are free to use the kitchen (fully equipped) free Wifi, the small library in the waiting room or the Pokestop directly at the Studio.
If it is your first visit you have to come a bit earlier, because you will get some instructions regarding the studio. They will show you around and explain you all the rules. Normally it takes about 30-15 minutes.
If you don’t need the instructions any more, you cant go earlier than booked to the Studio. If you insist going in earlier for preperations (and if the room is available) they will charge you.
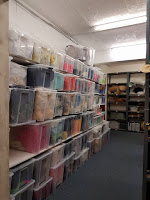
 Free prop rental:
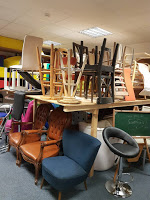
The studio offers 3 rooms full of props of every kind. You are free to use which ever props your want during the rental hours.
They offer different furniture’s, colored fabrics, special items like umbrellas and more.
I really like the variety of props they offer. Sadly the props are mostly not compatible to each other.
You could feel that they were just bought randomly. I am used to rental props which are compatible to each other in several ways for several purposes.
But if you use them wisely and have the time I guess, you can build up a really good setting with all these props.
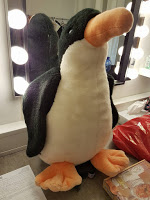
And they had a super cute penguin!!!
I wanted to take him home ToT
We rented Studio 2, 5 and 6.
Because the studios are closed for other people I didn’t had the chance to check them out. This is why I will only report about these 3 studios.
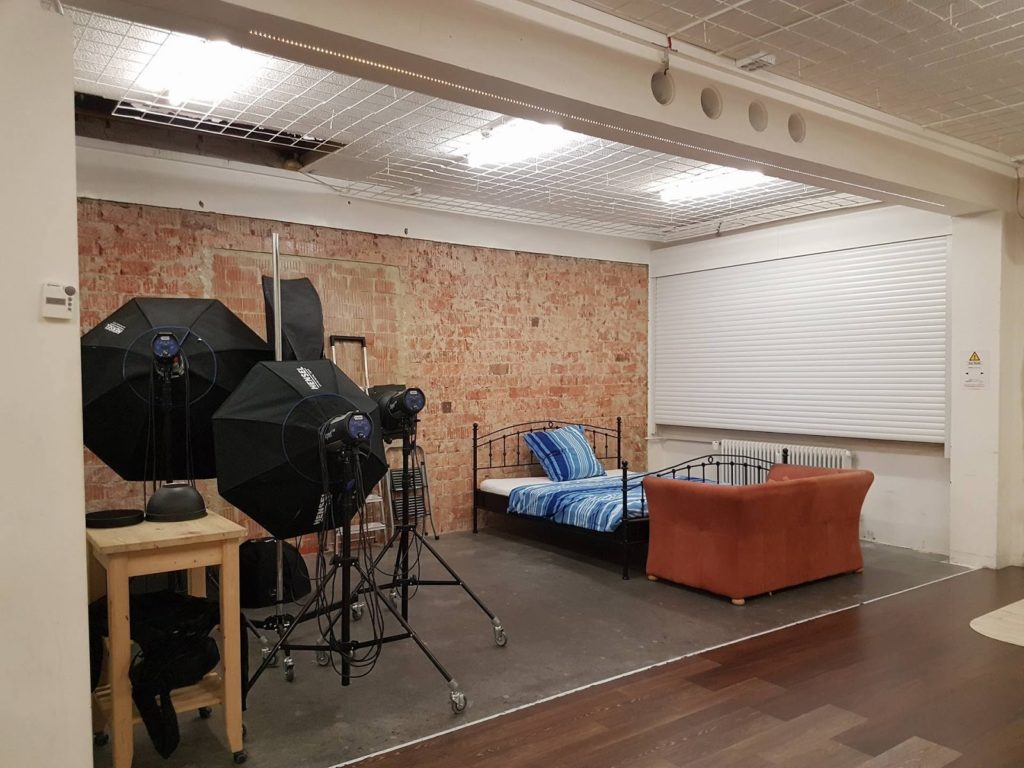
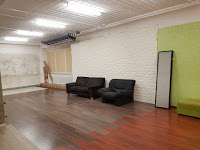 Studio 2
had different settings and some furniture’s. You could also rent a snow machine for this room.
You can rent this studio staring with 22 Euro per hour.
The settings were super basic and you only had 1 wall for every setting. Beside 1 corner, which had the same background.
It was super difficult to make pictures, cause you were only able to took pictures at an straight angle or from above. The walls weren’t really high and the owner didn’t paid attention to the upper parts and the ceiling of the studio. You couldn’t do any low angle shoots. It was really annoying, after you got used to cheap Japanese photo studios which always offers at least 1 corner with the same setting per setting/ room.
As you can see in the pictures, the settings are not furnished at all. You are more or less forced to use the props and build up your own settings, which wastes a lot of time.
I also was super unhappy, that you could only use the snow machine at 3 different settings.
The floor was a simple concrete floor and not very beautiful.
In the end we didn’t used the snow machine, although we paid for it. It was impossible to get good pictures with this ground.
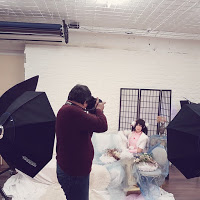
We decided to built up our own small setting and ended up doing close up shoots.
 My opinion:
Compared to German studios this studio is with 22 Euro per hour reasonable. You can try to share the studio with other people, because there is a lot of space.
If you are fine with close up pictures and really limited options due to their settings this studio is fine. Just be prepared that only straight shoots with limited options are possible.
You also need to consider in your rental time, that you need at least 1 hour to build up your setting and another 30 minutes to clean everything.
Compared to Japanese studios, Studio 2 is super expensive and very badly equipped. The options are too limited and you are actually better of just to rent a seamless backdrop or a small studio or space, where you can build up your own setting for a cheaper price.
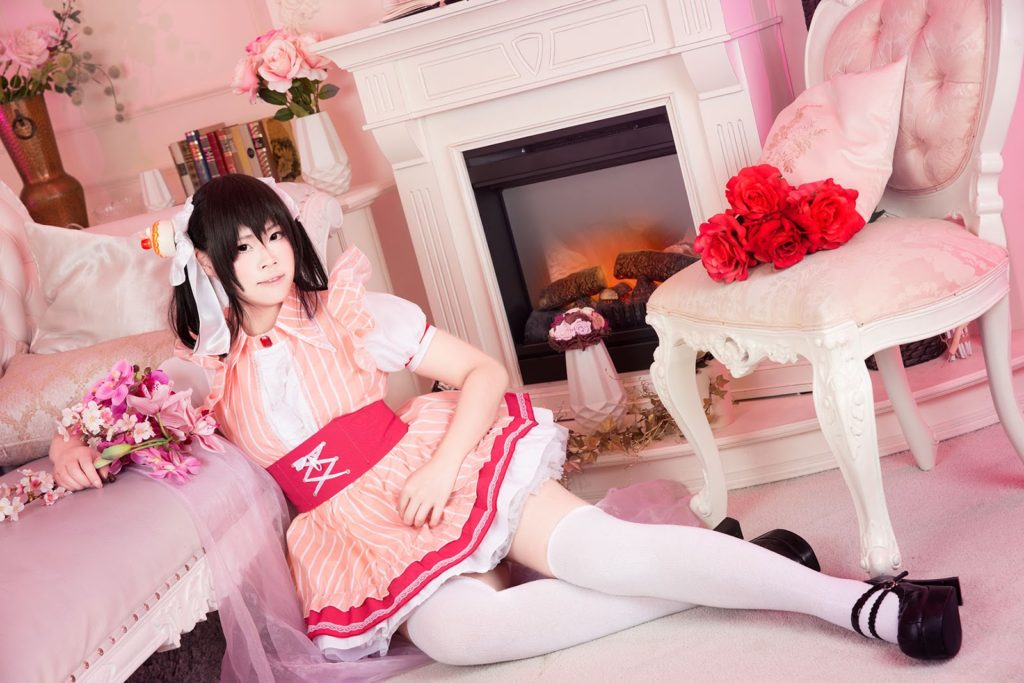
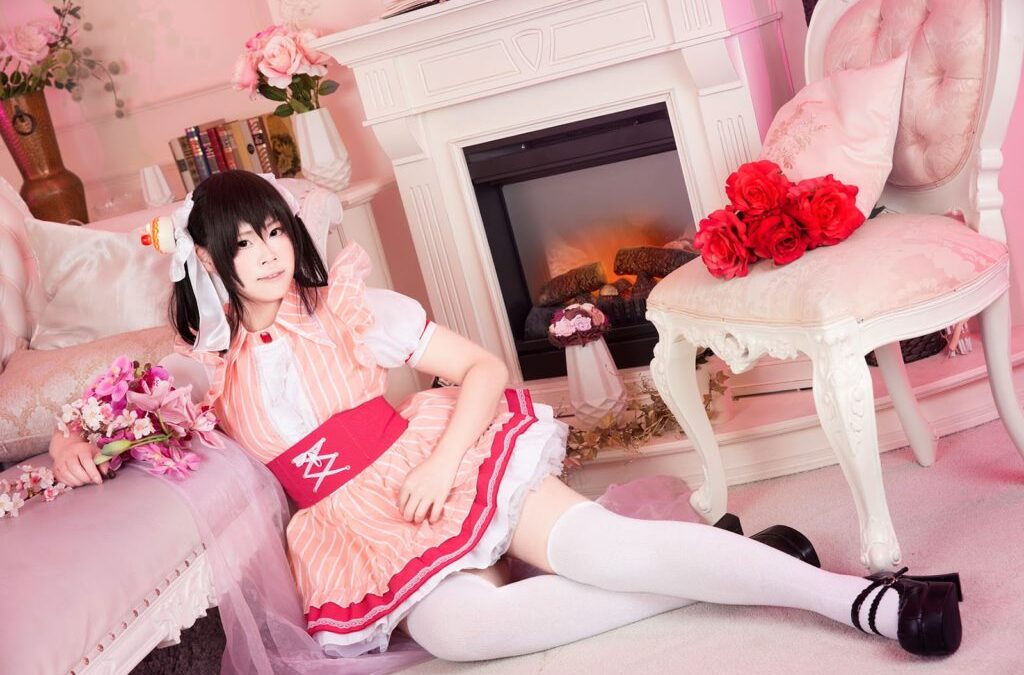
 Studio 5
was a fully furnished barock suit. This time you had an whole room as one setting.
In this room, the owner even payed attention to the ceiling.
The room offered a bed, a (fake) fireplace, a sofa, a chair and a table, a library and basic decoration.
Even the changing room is held in the same style as the room.
You can rent this room starting with 24 € per hour.
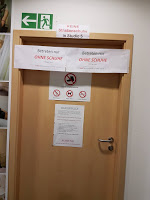
You are not allowed to eat or drink in this room (only in the changing room and technical room) and need to put of your shoes.
You can wear shoes inside, if they are part of your costume and clean.
Basically it’s a very nice idea and for German standards a very nice studio.
Sadly we experienced during the shooting, that we were very limited in our options.
While the walls in the downer parts were decorated nicely and some corners had a lot of details, some parts in the room were too plain.
Because everything was hold in light colors, but the walls didn’t had any details or beautiful wallpapers the room looked too plain.The balance was very difficult.
Of course if you are renting a room like this, you want to show the most beautiful parts of this room and not only a more or less plain background or risking an unbalanced picture.
This is why we started to rearrange the room and decorated it with a lot of different props.
Sadly this also took a lot of time and we were again really limited in our options and angles.
It was a bit better than in Studio 2 but still really unsatisfying.
 |
| Studio jolite |
My opinion:
If you compare it to the Studio jolite in Bochum, the ceiling was much higher and the settings were decorated so nicely and in a super balanced way. Of course we also needed pay attention to the balance in the picture, because even the wonderful wallpapers of this studio appeared plain compared to the settings. You still had a lot more options and didn’t wasted time to decorate the setting from zero by your own.
If you are ok with a plain looking Barock suit, because you want to make low key shootings or don’t want a too detailed background, I still would recommend this studio to you.
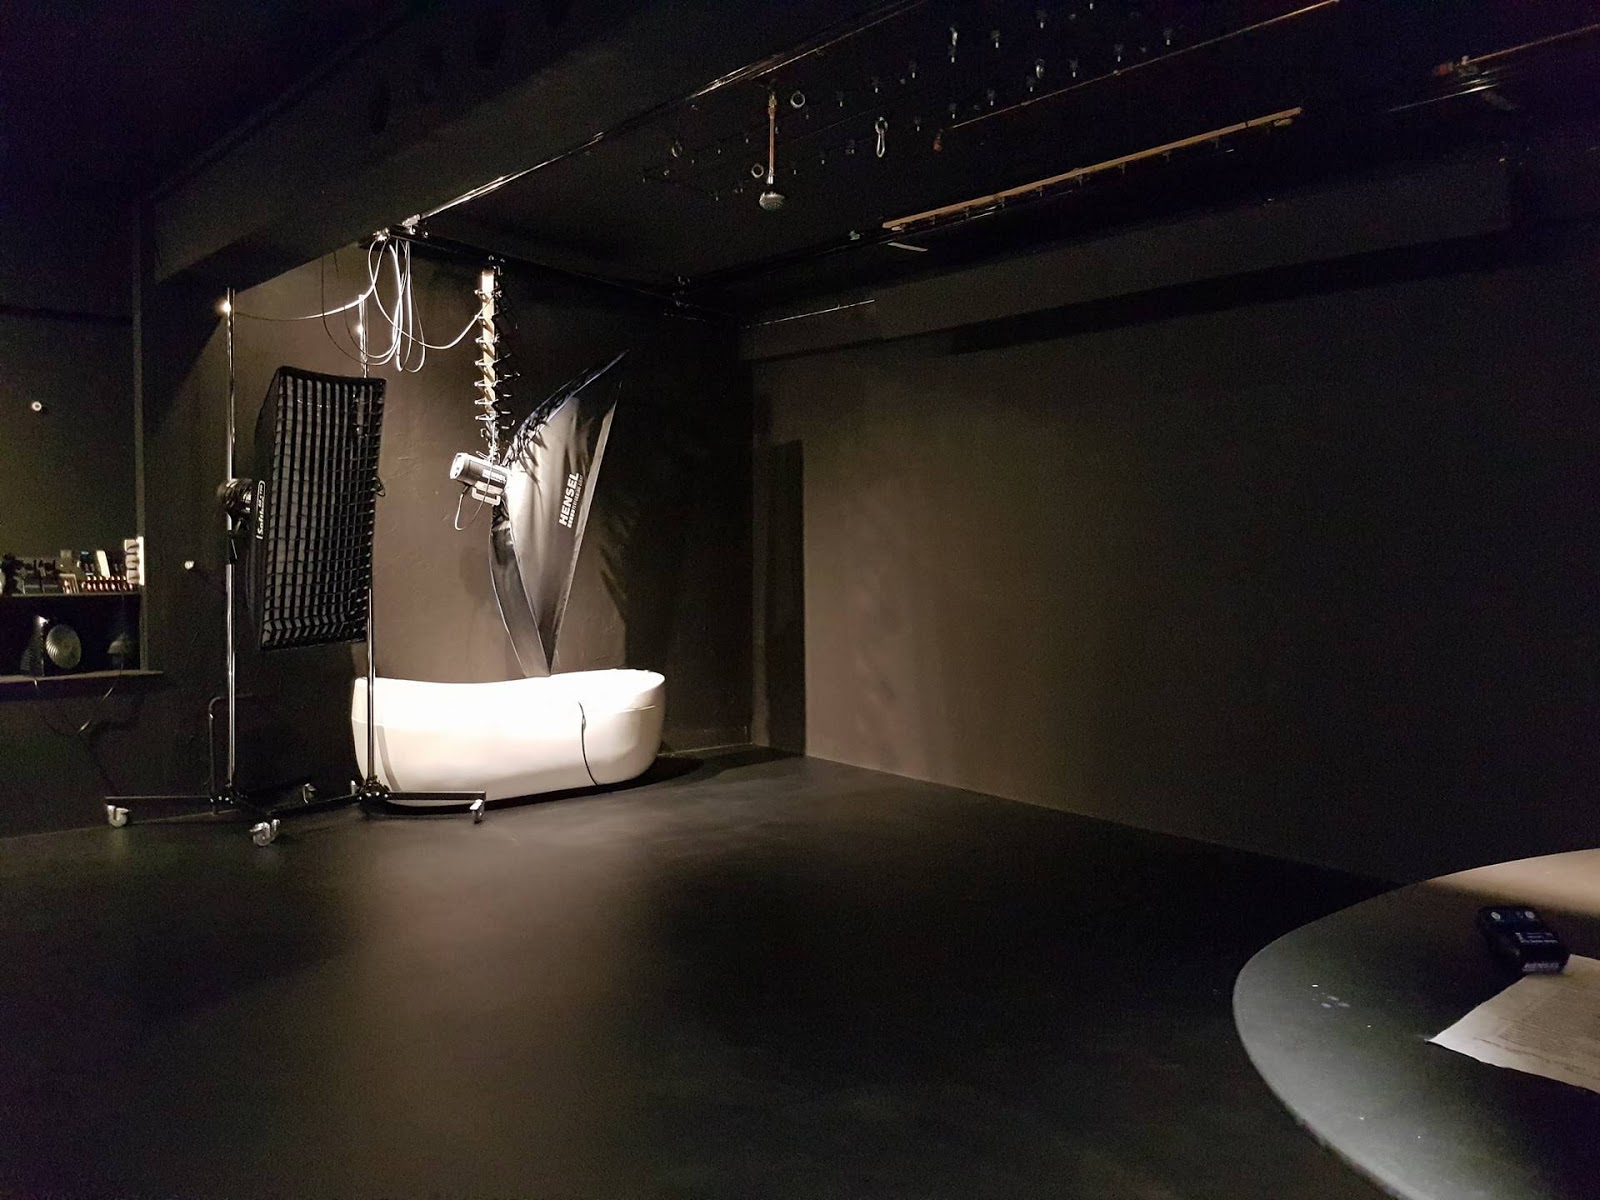
Studio 6:
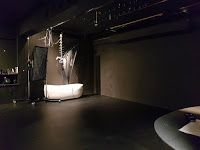
We booked Studio 6 for the Waterworld. You can also rent this studio without the waterset option for 17 Euro per hour. You pay an additional fee of 40 Euro for the water option.
Next to the 40 Euro you need to pay 2 hours extra for the preparation of the Waterworld and plan 1 hour for the cleaning of the room, which you have to do by yourself.
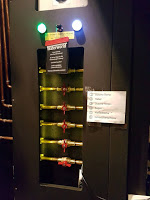 The Waterworld offers 3 different watertypes:
– drizzle
– rain
– different shower heads and tubing’s (just water from a tube)
With 5 different water connections
You can choose the temperature of the water exactly and we used this studio 8 hours non stop. And after 7 hours the boiler gave up.
It is actually a very good time, because we didn’t payed attention to the water usage at all… Unlike at the rain studio in Wuppertal.
The water is generally coming from above. If you want water from the side or from below, you can use the shower heads.
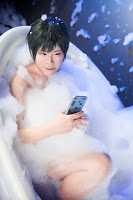
They also offer a bathtub with whirlpool functions.
The Studio 6 is a closed black room, which is why you are allowed to splash around however you like. You just need to be careful to a certain corner were the batteries and flashes are stored.
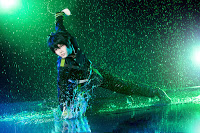
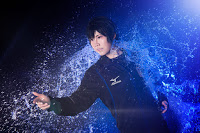
If you want to make splash shootings, this location is just perfect. Because even the ceiling is painted black, you could take pictures from a lot of different angles.
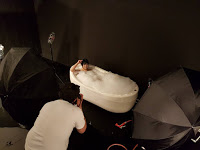
The drizzle option is super useful, cause the rain is super fine and it is more like a wet fog instead of rain. I really liked it because you are not getting wet immediately and still have the rain effect.
The bathtub was the highlight for me. Because we still had some spare time we decided to give it a try. The studio offers foam soap and we used the snow/ foam machine to create a nice background. It was really really fun and comfortable.
After the shooting you can use the towels of the studio or the bathrobe.
Sadly the changing room is not allowed to get wet (but you need to cross it if you want to change or go to toilet). So if you are trying to leave the studio room, you need to be super careful with your wet hair and cloths. It was sometimes really difficult to get yourself through this room without making the floor wet.
 My opinion:
Compared to Wuppertal you had more options regarding the shooting angles in the Studio 6, because you have a completely black and closed room. I also really loved the drizzling effect and that you could do splash shootings without being afraid to drown everything.
What was lacking, was the “small” pool we had in Wuppertal.
The water was gone very quickly, this is why you couldn’t jump or move into the water in order to get a small splash effect.
While in Wuppertal you don’t really need to clean up everything by yourself, you really need minimum 1 hour to get everything clean in this studio.
Especially if you played around with the bathtub and foam.
 |
| Uwe Lammer Studio in Wuppertal |
In Wuppertal you could see the seams of the mats at the ground of the rain set. It is generally very difficult to photoshop rain pictures, so it was really difficult to get ride of this seams.
In the waterworld, the ground even and completely seamless.
 |
| Dein Mietstudio in Stuttgart |
If you are going to rent this studio you should bring at least 1 assistant.
Someone who is regulating the rain flow, making the splashing or holding the foam machine.
Actually if you can, try to bring 2 people and if you can come in swimwear. Cause it is very hot and you will get wet very fast.
The studio has a shower, so don’t be afraid to get wet during this shooting.
My opinion about “Dein Mietsudio”:
If you need a simple studio, reasonable priced with good light equipment this studio is the best choice you can take. The light equipment is included (high quality flashes) and if you share the rental fee with some friends it is super affordable.
I also loved the prop rooms were you could use everything you might need (for the shooting or the penguin for your own happiness!).
If you are fine with simple backgrounds and don’t expect anything special, this studio is the right choice for you. But if you want to make a photo shoot with special backgrounds and decorated rooms, this is not the right place for you. I would recommend the studio jolite in Bochum if you are looking for a barock style photo studio. They are priced similar and you have more freedom regarding the angles and a more balanced background in the studio jolite.
If you are looking for a rain photo shoot I would definitely recommend trying out the waterworld.
It was a really good experience and you have a lot of different possibilities to use the water effects during the photo shoot. The Studio in Wuppertal is good if you need a pool like setting with water from above.
But if you want to splash around or use a bathtub, I would definitely go for the waterworld in Stuttgart.
This review is based on my own opinion.
If you have any questions please don’t hesitate to contact me.
Informations:
Name: Dein Mietstudio
Adress: Aleenstraße 18, 73230 Kircheim unter Teck